Please Note: The information below is being provided only for our aircraft owners and/or their
aircraft mechanics. This information does not necessarily apply to other light aircraft. And, some of the
maintenance procedures described below can only be legally performed by the aircraft mechanic and the owner
is not authorized to do this work. We will attempt to make notes of these things, but do not assume the
owner is authorized to do all of the maintenance, modifications or other procedures described below.
|
AIRCRAFT INSPECTION CHECKLIST
As described in the Aeropro Maintenance Manual, we provide an
Inspection Checklist
that provides considerable details regarding the aircraft and Rotax engine items needing inspected the first
time at 25 hours, every 100 hours (or Annual Inspection -- whichever comes first), along with some additional
longer-term inspection intervals for the aircraft and the Rotax engine. Also included with the Inspection
Checklist are a good number of notations and recommendations. The Inspection Checklist is updated
periodically with additional notes and information, so before every aircraft/engine inspection it would be
worthwhile to download and print a copy of the latest-version Inspection Checklist. To download the
latest version of our aircraft Inspection Checklist...
click here
The Inspection Checklist provides Rotax engine inspection information and we attempt
to include the latest information -- however, it is the responsibility of the aircraft/Rotax mechanic to check
the latest-version of the Rotax Maintenance Manual to assure that they are complying completely with Rotax
engine inspection requirements.
|
|
ROTAX ENGINE REGISTRATION
The purchasers of our new aircraft should register their new Rotax engine on the web site at...
http://www.flyrotax.com/engine-registration.html
Contact us if you have need any information or have any questions about completing the Rotax registration form.
|
|
FAA ADS-B Performance Report Request
Almost all of our aircraft are being equipped with the uAvionix ADS-B Out/In system. This equipment provides for
2020-compliant ADS-B "Out" and also provides a dual-channel ADS-B "In" receiver. It is easy for the pilot to see that the ADS-B receiver
is working -- the uAvionix system outputs via WiFi to your appropriate device (usually an iPad or iPhone) and you can see on your "app"
(such as WingX Pro7 or Foreflight or iFly or FlyQ or other) the aircraft traffic and the FAA-transmitted weather info. However, you don't know
for sure if your ADS-B "Out" transmitter is working properly unless you use the FAA system that will provide a quick, free "Performance Report."
The best way to do this after a reasonably long flight (like 30 minutes or longer) and at some decent altitude, and if
you are in an area that has good FAA ADS-B coverage (which is most areas). After you are back home you can get an ADS-B Performance Report
by going to the FAA web page at... https://adsbperformance.faa.gov/PAPRRequest.aspx
For some help in how to complete this FAA web page/form, we have some information at...
http://www.aerotrek.aero/aerotrek-tips/faa-performance-report-info.pdf
Please contact us if you have need any other information or have any questions about completing this FAA form.
The FAA ADS-B Performance Report "users guide" is available on the FAA web site at...
https://adsbperformance.faa.gov/PAPRUsersGuide.pdf
further note: If you get a Performance Report indicating a good bit or maybe almost completely showing
missing "Baro Alt" (the pressure altitude transmitted by the transponder) and/or missing some "3A" (squawk code transmitted by the transponder), then
very likely the EchoUAT unit just needs a "transponder threshold adjustment" as shown on the uAvionix web site at...
https://uavionix.com/articles/echouat-transponder-threshold-adjustment/
|
|
ELT345 REGISTRATION - a legal requirement for all new aircraft owners

Our aircraft since early 2017 have been equipped with the Artex ELT345 ELT (Emergency Locator Transmitter) or the ACK ELT E-01.
These are the newer-type 406 MHz ELT that transmits direct to satellites some detailed info about the aircraft and helps provide a
pretty close location of the aircraft. This is a huge improvement over the earlier-design ELT's and a big safety improvement if
the ELT is ever activated. However, these ELT's must be "registered" with NOAA (National Oceanic and Atmospheric Administration) by
the new aircraft owner, or the purchaser of a used aircraft with the newer-type ELT or when such ELT is installed in an older aircraft.
This is not difficult to do and costs nothing. To register your ELT, you go to the NOAA web page at...
http://beaconregistration.noaa.gov
To complete the registration process on this web page, you will need to "create an account" and provide some
information -- we recommend that you save a note for yourself about the information you provide during the registration process,
for later reference if you ever need it.
The only thing you will need that you might not have readily at hand is the ELT's 15-character "code" that
is printed on the ELT (which is installed behind and below the right seat in our aircraft). But, you don't need to remove your fiberglass
seat base to find this ELT code because we list this code on the Weight & Balance / Equipment List we provide with the new aircraft.
(or you can call or email us and we can send the code to you because we keep this in our records).
During the ELT registration process, you will need to provide your name and address and your email address.
You will need to create a password for this account. You will need to create some answers to four "challenge questions." You will
need to provide an Emergency Contact name and phone number and an Alternate Emergency Contact and a phone number. So, if you are
ready to provide this information, you will find that you can "register" your new ELT345 pretty quick and easy. If you have any
questions or need any help, just call or email us.
|
|
FINDING AN AIRCRAFT MECHANIC WHO ALSO HAS ROTAX TRAINING AND CERTIFICATION (AND EXPERIENCE)
Our aircraft have the Rotax engines and so to have proper inspections and service work,
we need to have our work done by an A&P or LSRM-A that has the required Rotax training. The basic training is
the Rotax "Service" course (a two-day course), and this should be followed by the Rotax "Maintenance" course
(another two-day course). Beyond that is the Rotax "Heavy Maintenance" course (a three-day course). It is
not always easy to find a mechanic with the appropriate training and experience.
The Rotax flying club web site at...
http://rotaxflyingclub.com has a link to a list of some technicians on their web page at...
http://rotaxflyingclub.com/locator However, it
needs to be mentioned that there are lots of people who have gotten some Rotax training but are not in the business
of or otherwise available to work on people s engines. And... unless they are an A&P or an LSRM-A, they are not
legal to be working on an S-LSA aircraft. On the USA map with all the little "markers" showing where there are
Rotax-trained people, the "pink" markers are for the people who are LSRM-A mechanics (and they can work on our
planes). The "blue" markers are for the people who are A&P mechanics (and they can work on our planes, of
course). The larger dark-gray markers are for repair shops that should have A&P's who have Rotax training. The
"green" markers are for people who have had some of the Rotax training, but apparently are not LSRM-A or A&P's
and so are not legal to work on our airplanes (well, not per se -- they could do the engine work but only under
the supervision of an A&P).
Rainbow Aircraft provides LSRM-A training, and they maintain a list of people who have
had this training on their web site at...
https://rainbowaviation.com/?page_id=4854 However, again... there are quite a few individuals who get
this training and who are NOT available to work on anybody s plane. Or, to a great extent, these are people
who have only had the initial, basic Rotax Service training at Rainbow Aircraft and who may not have
adequate training to do full, proper inspections or certain service or repair work on the engine.
We should note that our Aerotrek aircraft mechanic (James Leone) at our Indiana location
is available for Annual Inspection and for other work on our aircraft. But in addition, James is usually available
to do "on-site" aircraft service work any place in the USA. James can drive to locations (usually within a 10 to
12-hour drive from our location" or can fly via airline to any place in the USA. It costs a bit for James to make
a trip to do the Annual Inspection or other work at your own airport -- but this can be a real convenience for the
aircraft owner and James is the most experienced aircraft mechanic in the USA on our Aerotrek/Aeropro aircraft. And
James is a highly experienced Rotax mechanic -- particularly for the Rotax engines as installed in our aircraft.
If you are interested in James doing work on your aircraft and particularly for on-site service for your aircraft,
contact us for details, costs and scheduling.
|
|
FAA AIRCRAFT REGISTRATION RENEWAL (every seven years...)
A few years ago, the FAA changed the old system (where an Aircraft Registration was good forever) -- and now every Aircraft Registrations
needs to be "renewed" (re-registration) every even years (at first it was every three years - but they changed it to every seven years). As the FAA web page explains it...
When is it Time to Renew an Aircraft's Registration? Aircraft registration expires (now seven) years after an aircraft was registered or last renewed. The registration renewal date-to-file is scheduled five months before the expiration. The application for registration renewal
must be filed five months before registration expires to enable delivery of a new certificate before the old certificate expires. This provides a safety margin
for correcting application errors. Prompt filing does not change the new expiration date.
See this for more information and to re-register on the FAA web page at...
aircraft registration renewal
|
|
WING-FOLDING PROCEDURE
We have a .pdf file with photos and text showing the steps for folding the wings on our aircraft at...
wingfold-checklist.pdf
The Aeropro distributor in England has made a good video showing the wing-folding procedure and
you are see this on YouTube at...
https://www.youtube.com/watch?v=iI06NH4DPGA
This video is showing the wing-folding procedure a little differently than how we normally do it, but
most of those details are minor and this video is still informative and helpful. Still, it is best to be taught the wing-folding
techniques in person to get the best and easiest results and reduce chances of damaging anything during the process or
when loading and hauling your aircraft in a trailer.
|


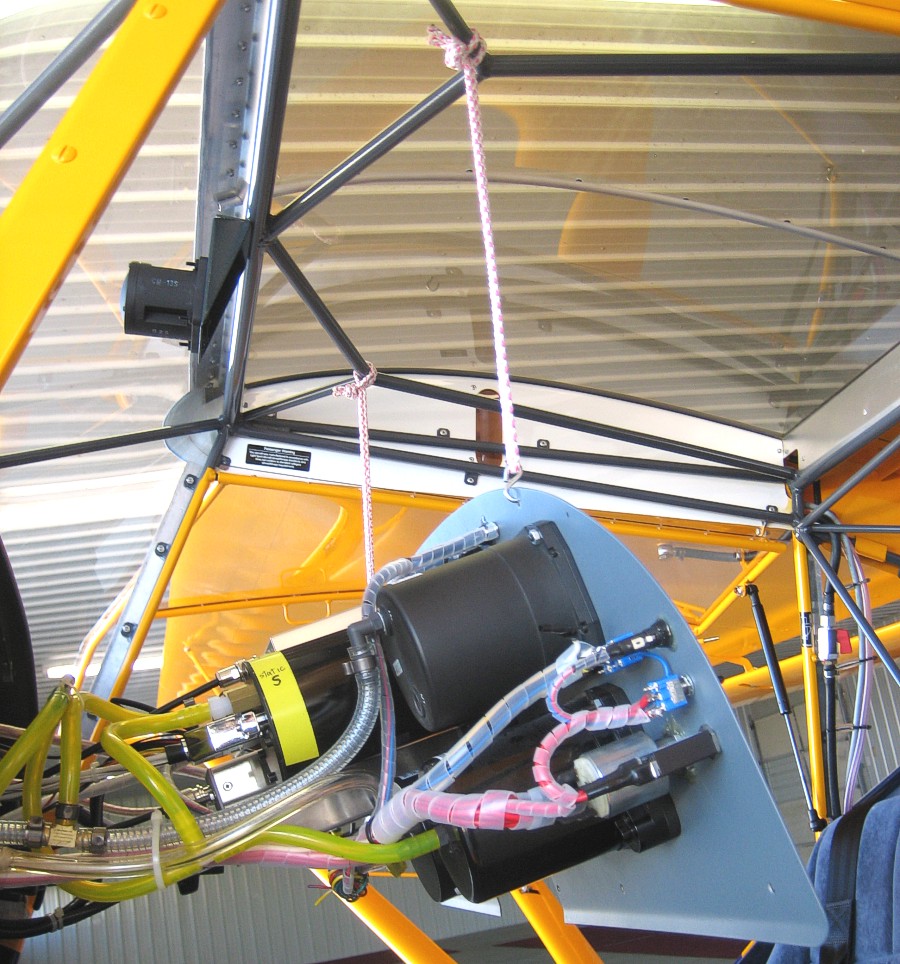
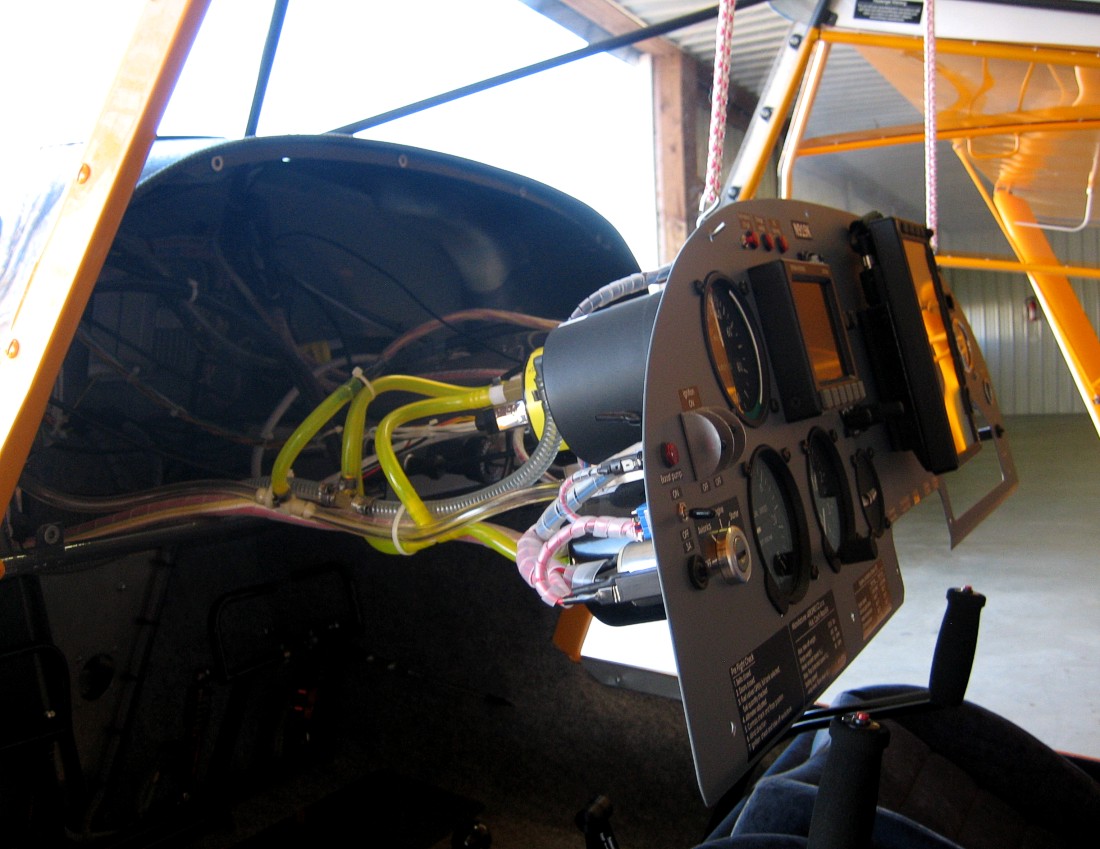
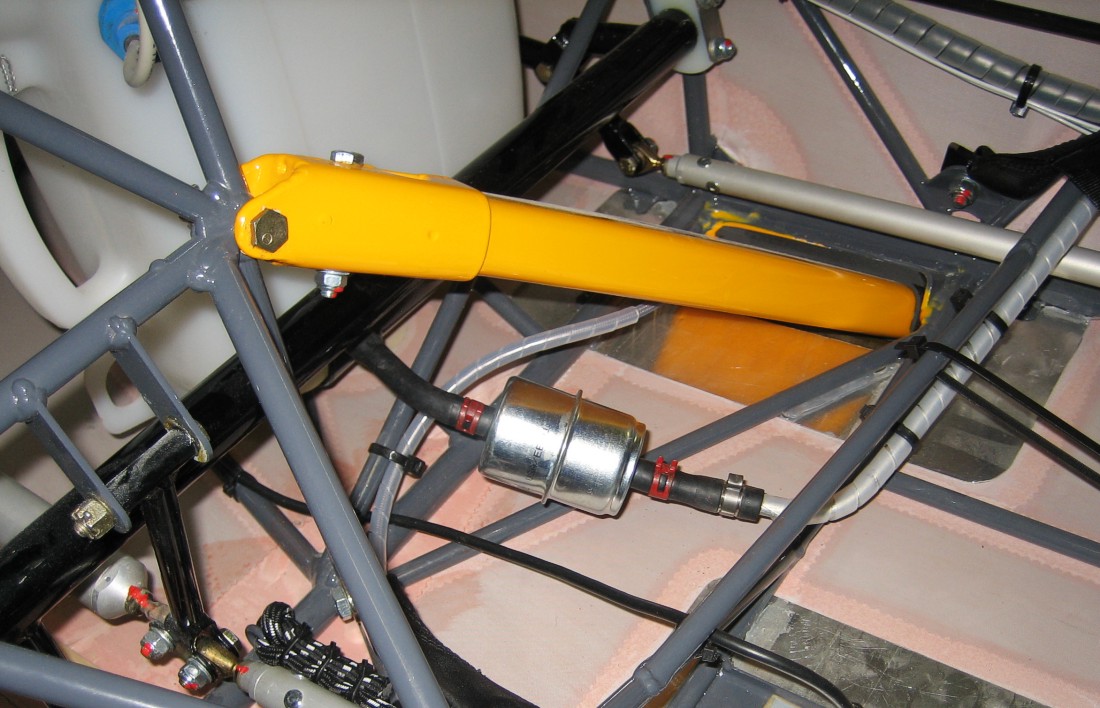
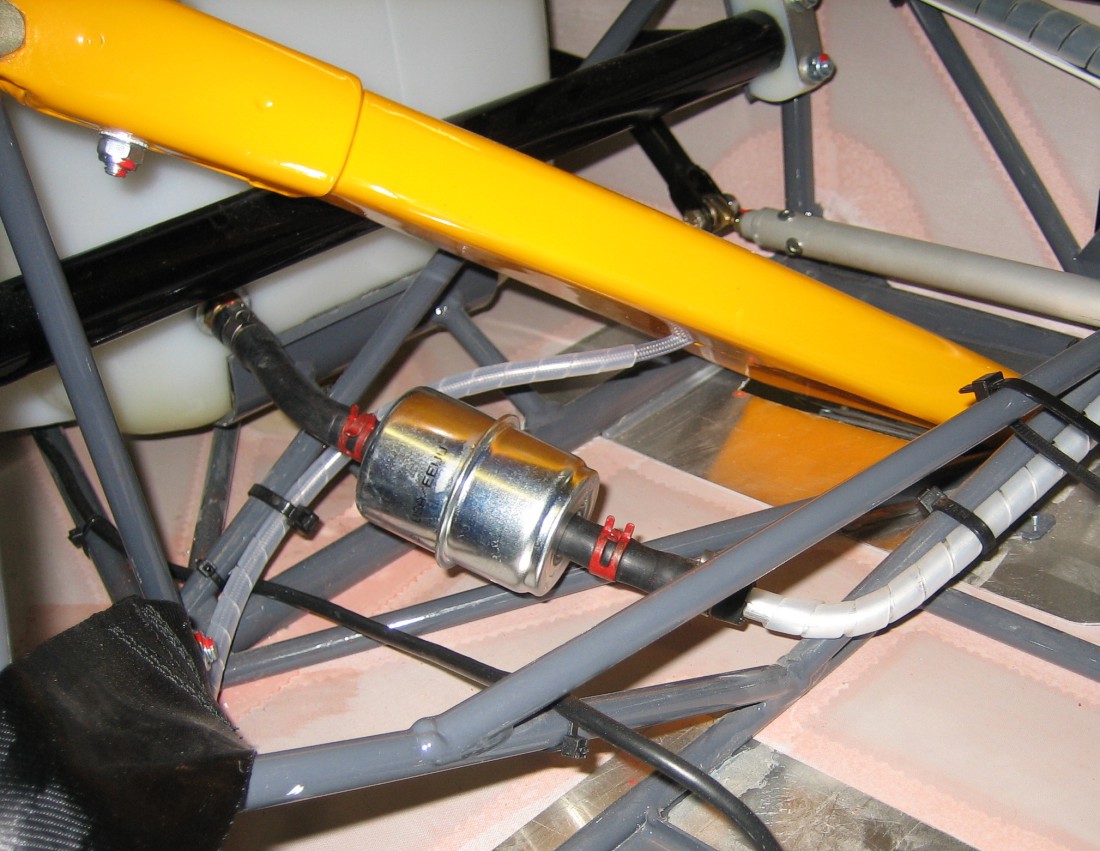
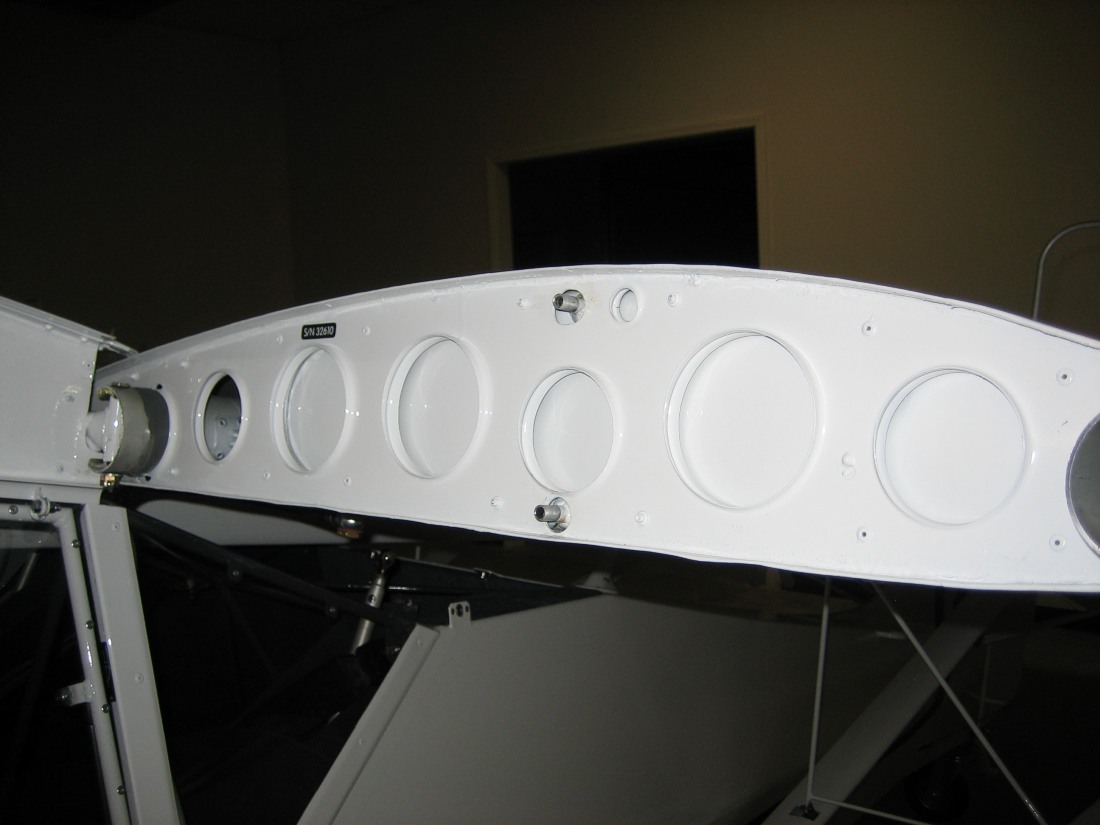
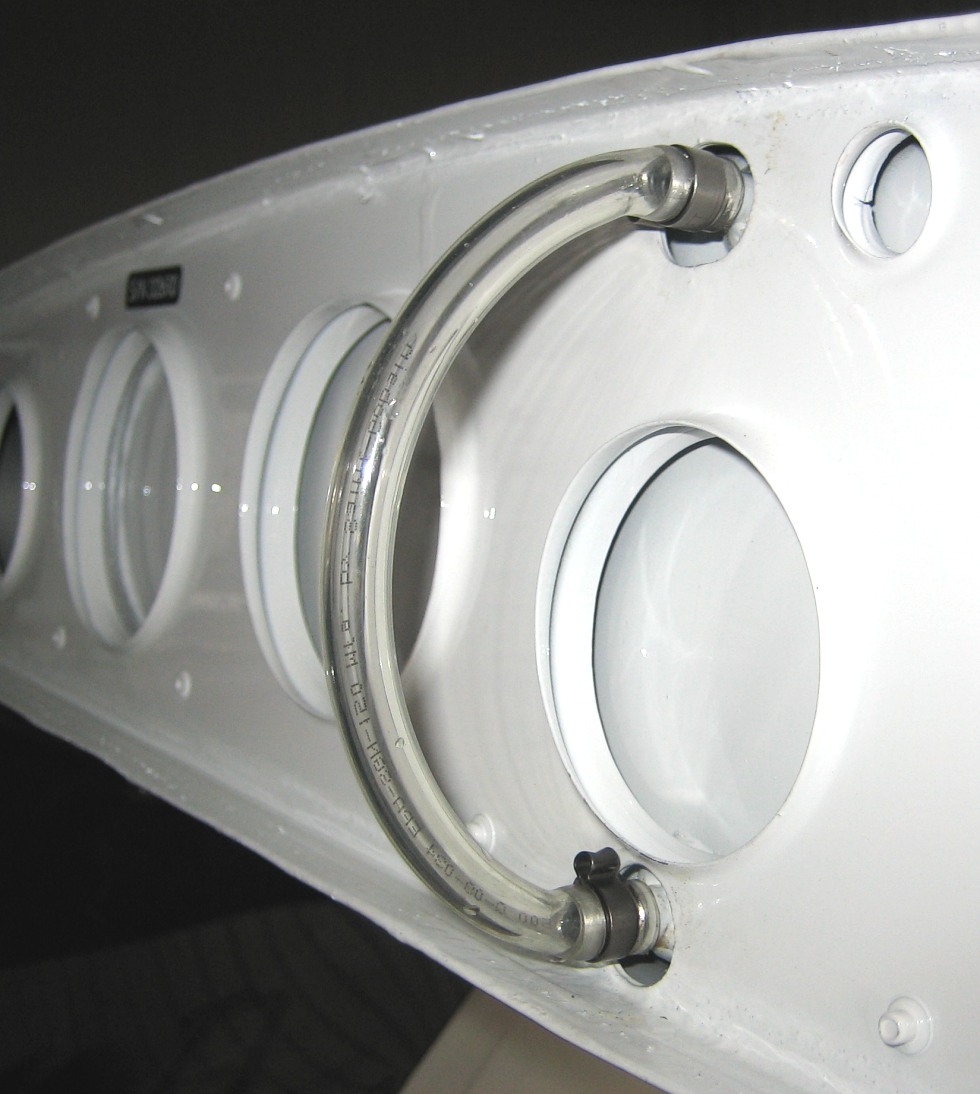
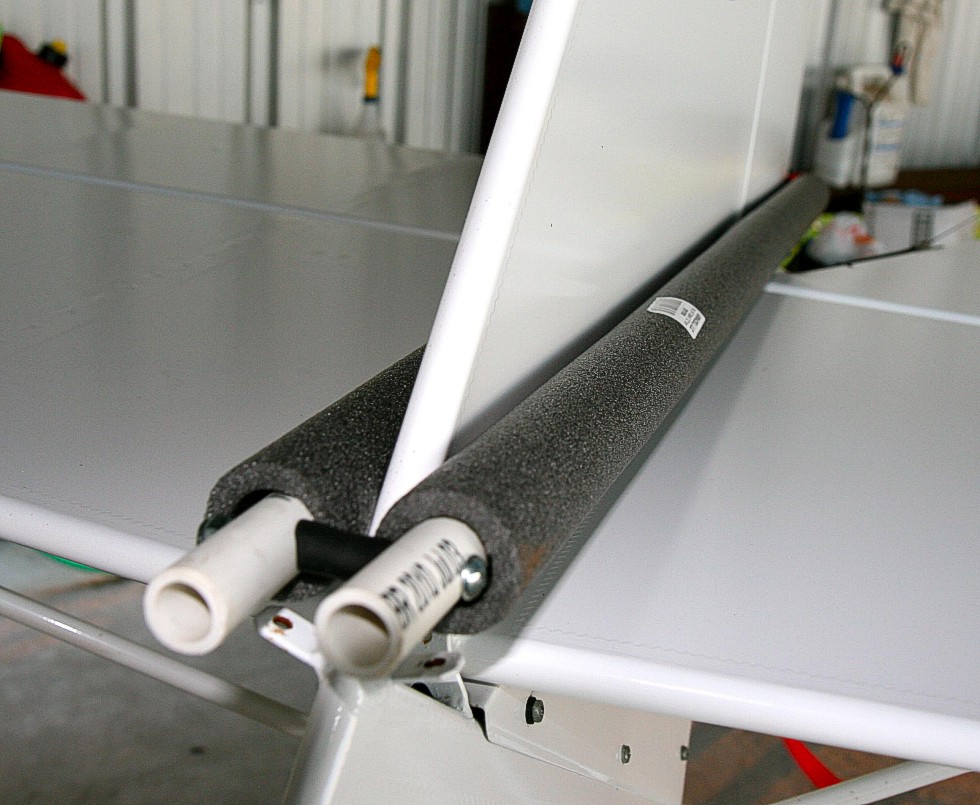
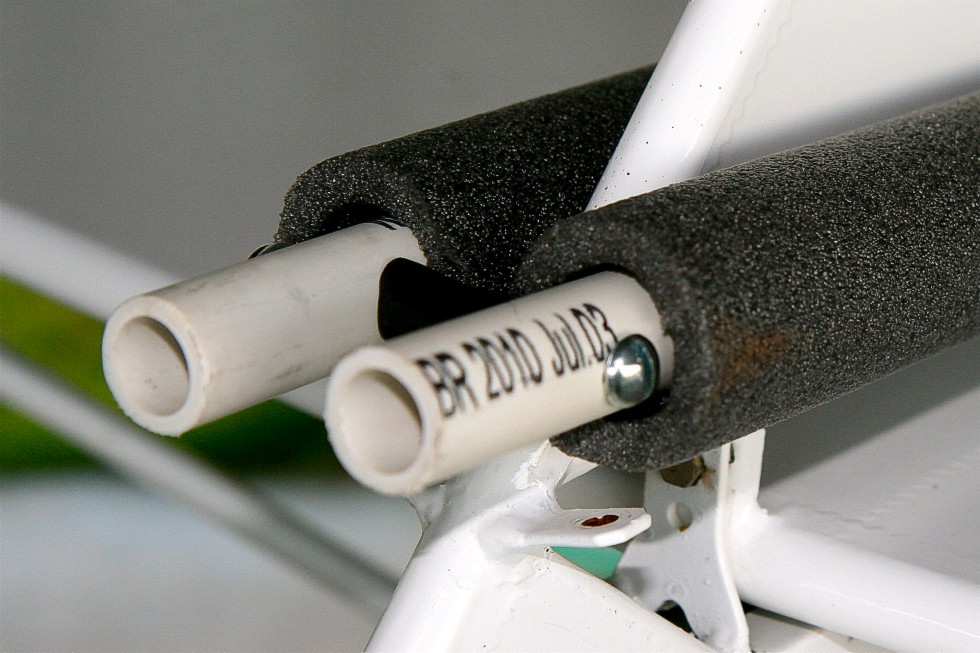
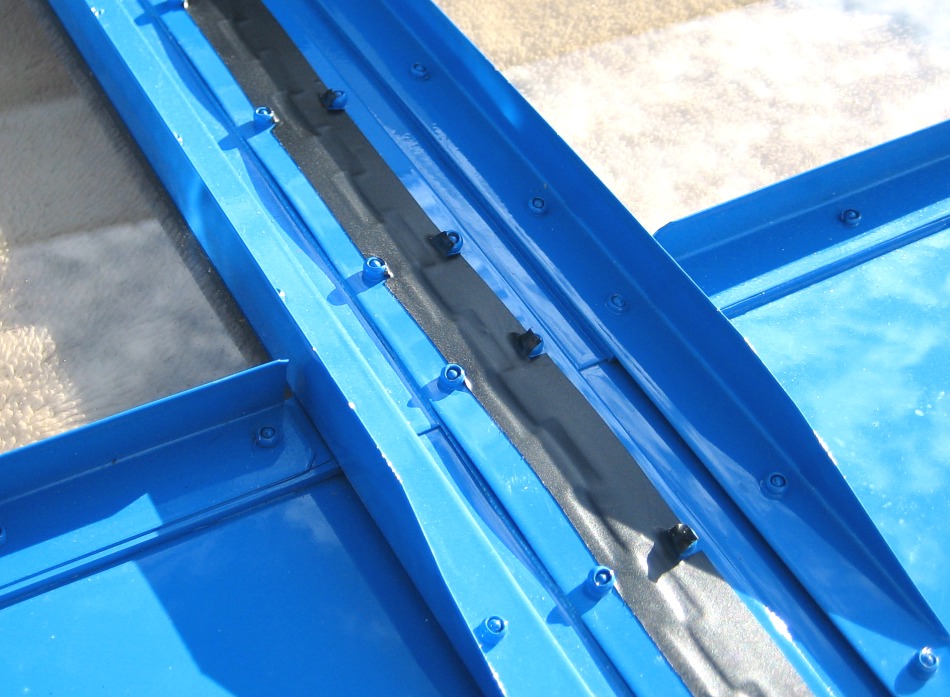
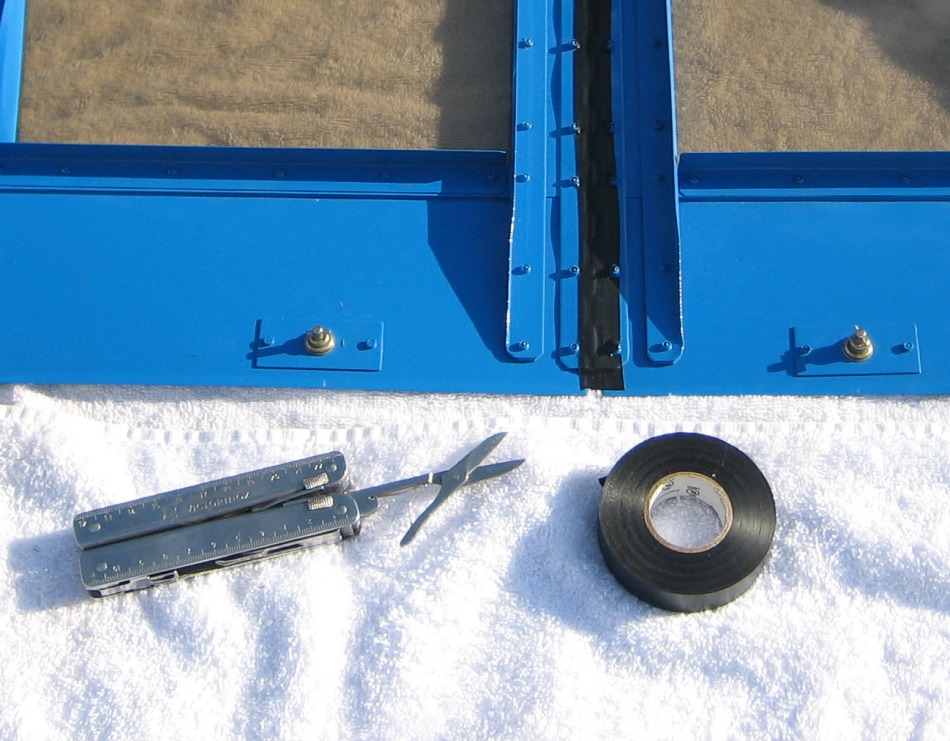
REPLACING THE HEADER TANK VENT LINE
We have found over the years that the translucent plastic header tank vent lines used in earlier years would eventually get stiff
and even "shrink" and could be a problem. So, we no longer use this line. Instead, we are using the Gates H175 1/4" ID (7/16" OD) fuel line as shown
in the photos above. This special fuel line is readily available from NAPA or from us and we keep it in stock for $3.00/foot.
This black fuel line is more resistant to kinking than all of the plastic vent lines we've used, and does not require being wrapped with plastic
spiral wrap (though it still needs routed with care, of course).
For our older planes with the clear or yellow plastic header tank vent lines, we strongly recommend replacing the header tank vent
line at the next Annual Inspection. This is mentioned in our Inspection Checklist
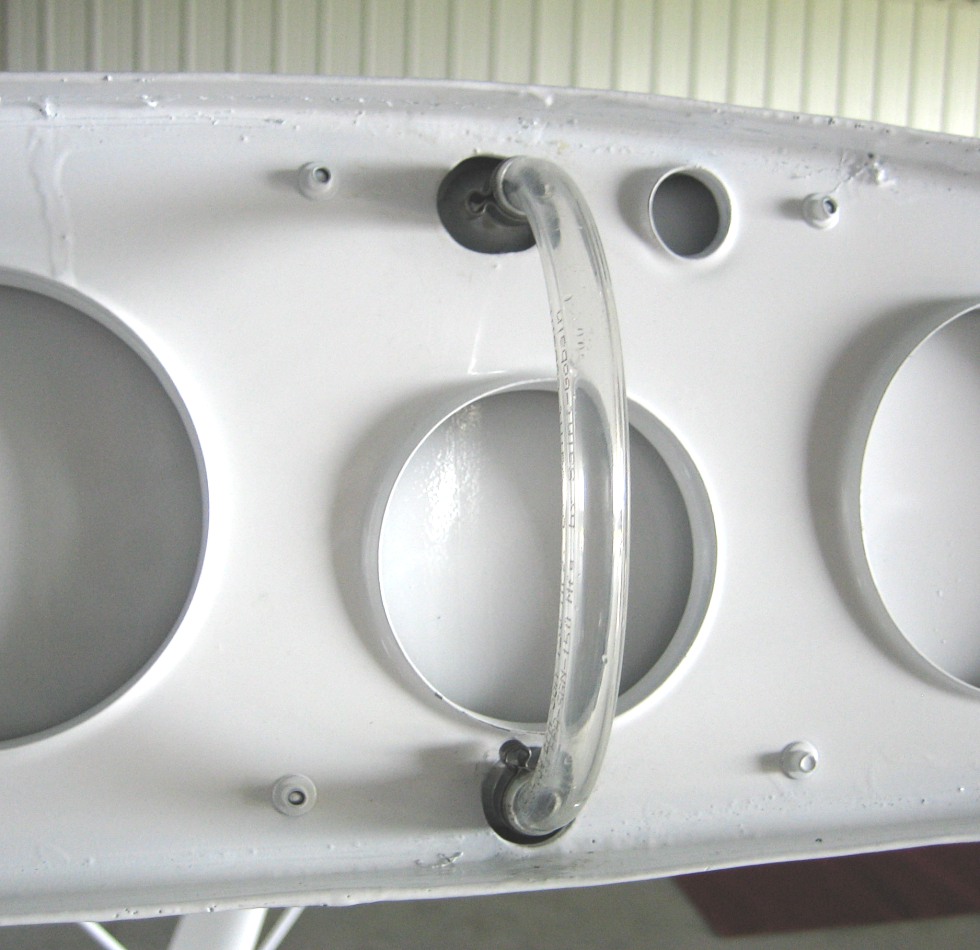
It is also very important to make sure the header tank vent line is properly routed so it is not "pinched" or strained/pulled when the wings are
folded. There is more detailed information about this on a .pdf file at...
header-tank-vent-line-replacement.pdf
NOTE: The clear tube on the right side of the cockpit is part of the pitot line, and only air pressure moves in this clear
plastic line and it should last a very long time. Still, at Annual Inspection when the wings are folded, this clear line should be checked to be sure it
is still pliable and not pinched (including when the wings are folded) -- and check to be sure it is routed properly. Also, if there is any abrasion or
wear on the clear pitot line, it should be replaced or protected using some plastic spiral wrap.
please note: replacing the header tank vent line is not "owner maintenance" and only should be done by a qualified aircraft
mechanic

TRAILERING TIPS
Our planes have quick-folding wings and a number of our aircraft owners occasionally transport their planes in enclosed trailers (and a few occasionally
transport their planes on open trailers). It is important to properly secure the plane in or on a trailer, and so we have created a "Aerotrek Trailer Tips"
web page at... trailer-tips.htm
|
|
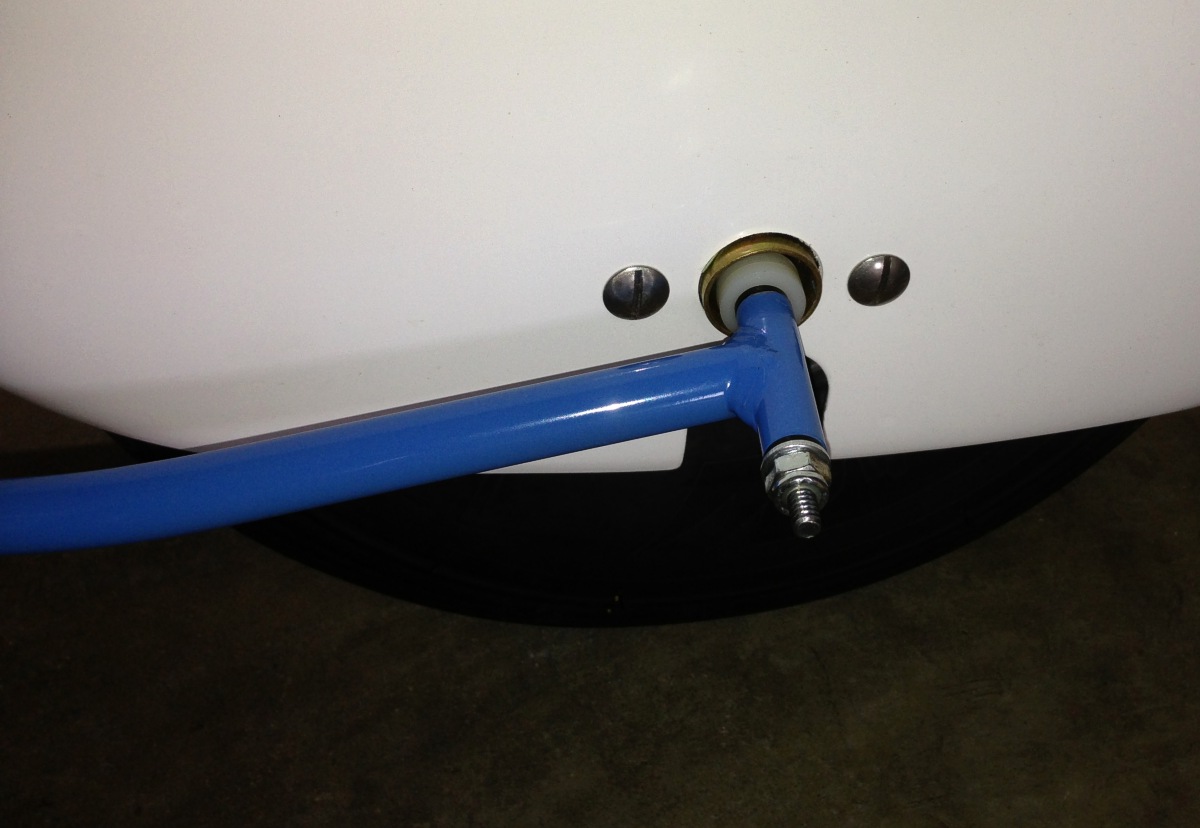
AEROPRO RUDDER-CENTERING DEVICE (and rudder trim adjustment)
The Aeropro aircraft manufactured since 2012 have a special "rudder centering device" that provides for
greatly improved yaw stability. This system includes a ground-adjustable rudder trim system and this is described and how to
adjust the rudder trim is explained on a .pdf file at...
aeropro-rudder-trim-adjustment.pdf
|
|
LIST OF ETHANOL-FREE GAS STATIONS OFFERING AUTO FUEL
The Rotax 912-series engines run best on premium auto fuel, and they do OK even with ethanol in the gasoline. However, there are
some advantages to avoiding ethanol when possible. A list of gas stations offering ethanol-free auto fuel (though not necessarily
offering premium) is on a web site at... http://pure-gas.org/
A web site listing some airports with auto fuel is at...
http://flyunleaded.com/mapusairports.html Note: Many times
airports listing auto fuel will just have regular 87 octane gasoline, and this is not enough octane for our aircraft (unless
perhaps mixed 50/50 with 100 octane avgas - if a pilot wants to and is able to go to this much trouble to reduce the amount of
avgas being used...).
|

|
OIL FOR THE ROTAX 912ULS AIRCRAFT ENGINES
The only oil recommended and approved by Rotax for use in the 912-series engines is the Aeroshell Sport Plus 4 oil.
However, this oil is a little expensive. The several Rotax distributors and other companies sell the oil, but we
have found some companies that tend to have a bit better price in cases of 12...
in Pennsylvania, "The Oil Store" web site is at... https://oil-store.com
or go direct to their aviation oil web page at...
https://oil-store.com/products/aeroshell-sport-plus-4
in Missouri, "AirplaneOil.com" is another good source per their web page at...
https://www.airplaneoil.com/
Note: Web pages change so be careful if you order some oil -- be SURE that you order the Aeroshell Sport Plus 4 oil, and not anything else.
Additional Note: It is essential that only the actual Rotax oil filters be used with our engines. There are aftermarket
oil filters that will "fit" -- but they are not the same and must not be used.
|
|
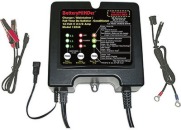
MAINTAINING YOUR BATTERY
It is essential to maintain a good charge in your battery, to protect the battery health and life. Details about
the batteries used in our planes and details regarding charging and maintaining is on a separate web page at...
Aerotrek battery maintenance
|
|
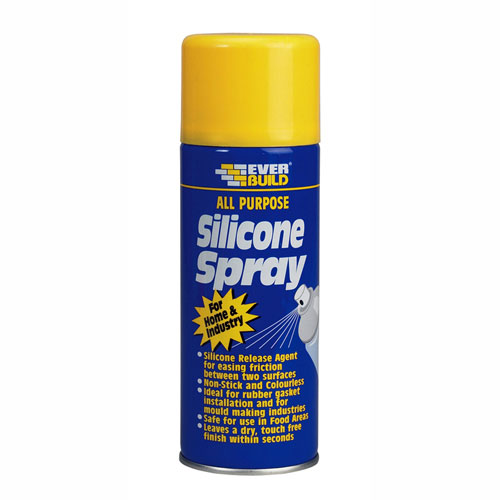
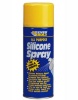
SILICONE SPRAY TO REDUCE CORROSION ON ENGINE AND CARBURETORS
The Rotax engine and carburetors are most made of aluminum. Aluminum doesn't rust, but bare aluminum does tend to get some light white corrosion (aluminum
oxide) over time. This doesn't hurt anything, but it doesn't look good. To reduce this tendency to corrode, it is worthwhile to occasionally spray "silicone
spray" on the aluminum surfaces of the engine and the carburetors. Silicone spray is low-cost and available at auto parts stores and Walmart. After spraying
on the engine, the silicone spray dries and leaves a light dry silicone coating. Spray on a cool (not hot) engine. Repeat as often as you want.
|

|
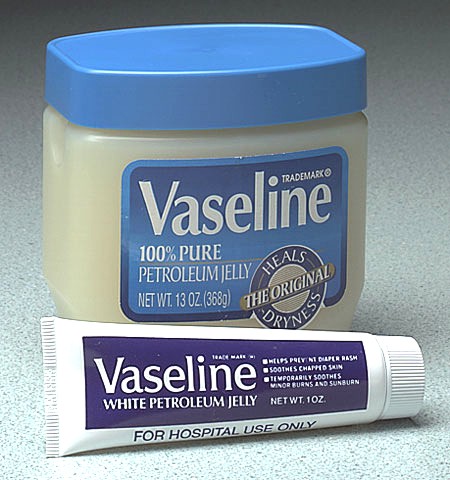
VASELINE FOR THE FUEL CAP RUBBER GASKET
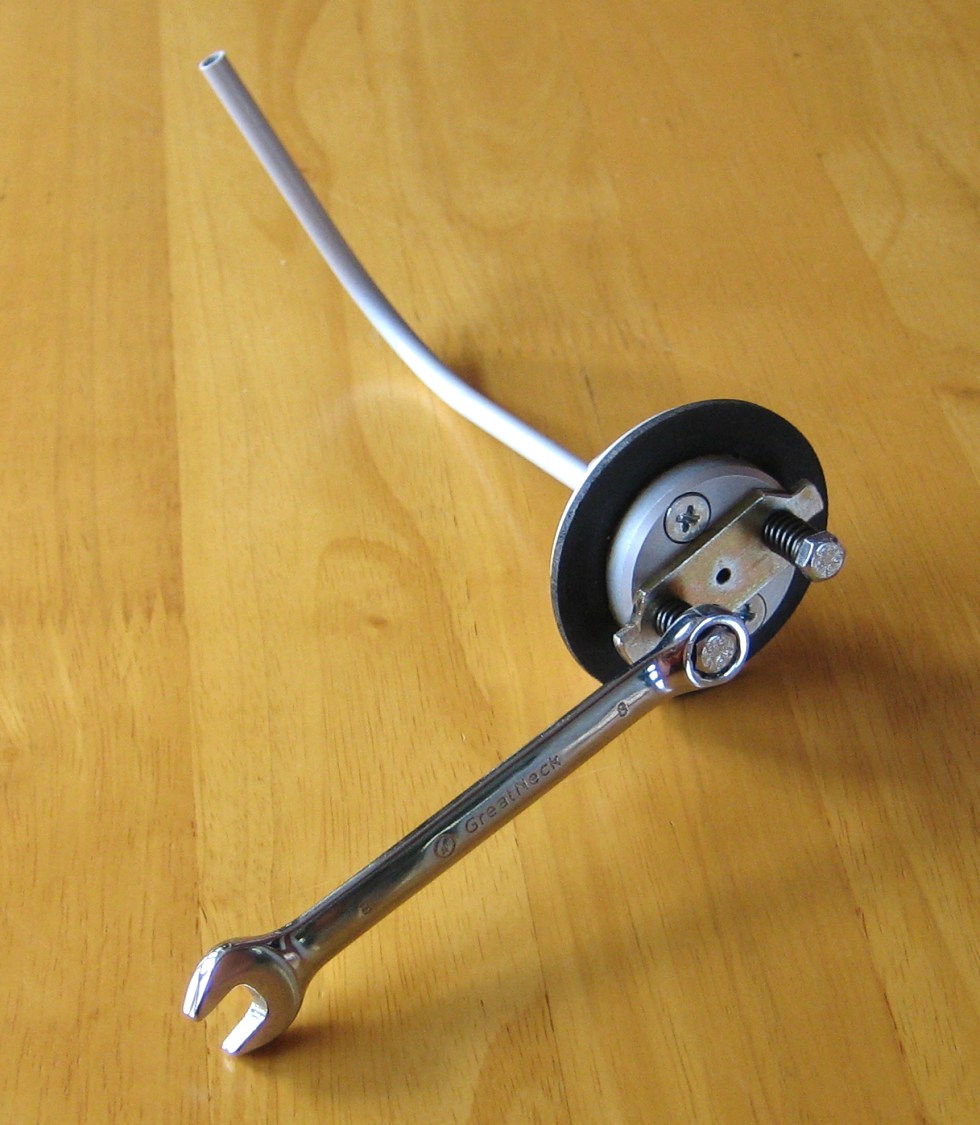
It is very helpful to keep a thin coating of Vaseline on the fuel cap rubber gasket. Without the grease
(Vaseline is what we recommend) on the rubber gasket, the fuel cap is very hard to open and close (even
sometimes requiring a small wrench to fit onto the fuel cap to be able to turn the fuel cap and remove it),
and the rubber gasket wears and may need replaced in a year or less. We suggest keeping a very small
squeeze-tube of Vaseline in your plane so that you can apply a thin coating of Vaseline to the fuel cap rubber
gaskets whenever they start to get "dry" and a little difficult turn. Some people lubricate the gasket by rubbing
a little gasoline on the rubber gasket after refueling the plane -- and this does nicely lube the gasket for
putting the fuel cap back on, but the gasoline dries-out and the fuel cap is very hard to remove the next time
you fuel-up your plane. So... a little Vaseline works much better. NOTE: The fuel cap gaskets do often
require replacement sometimes every few years and we keep them in stock and they cost about $4.50 each (2020 price).
|
|
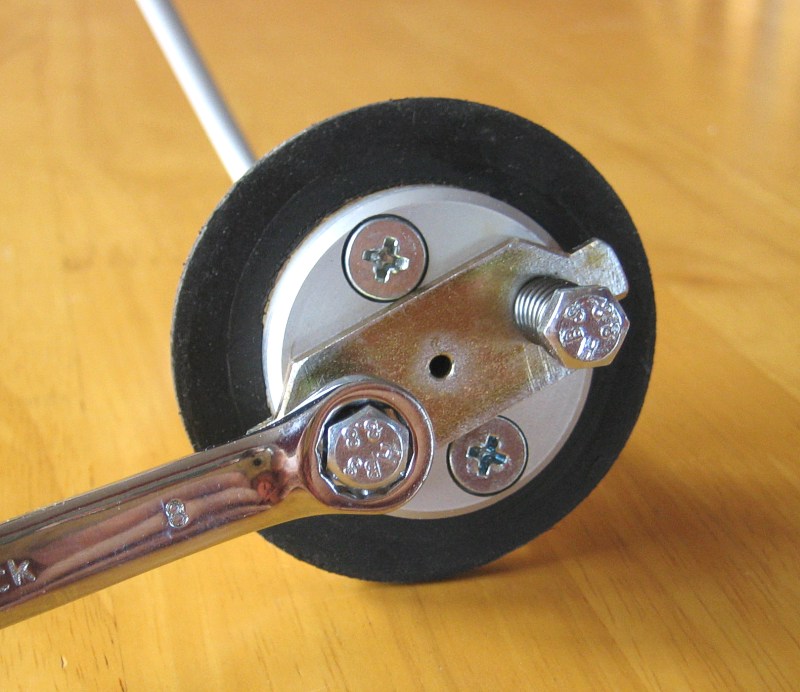
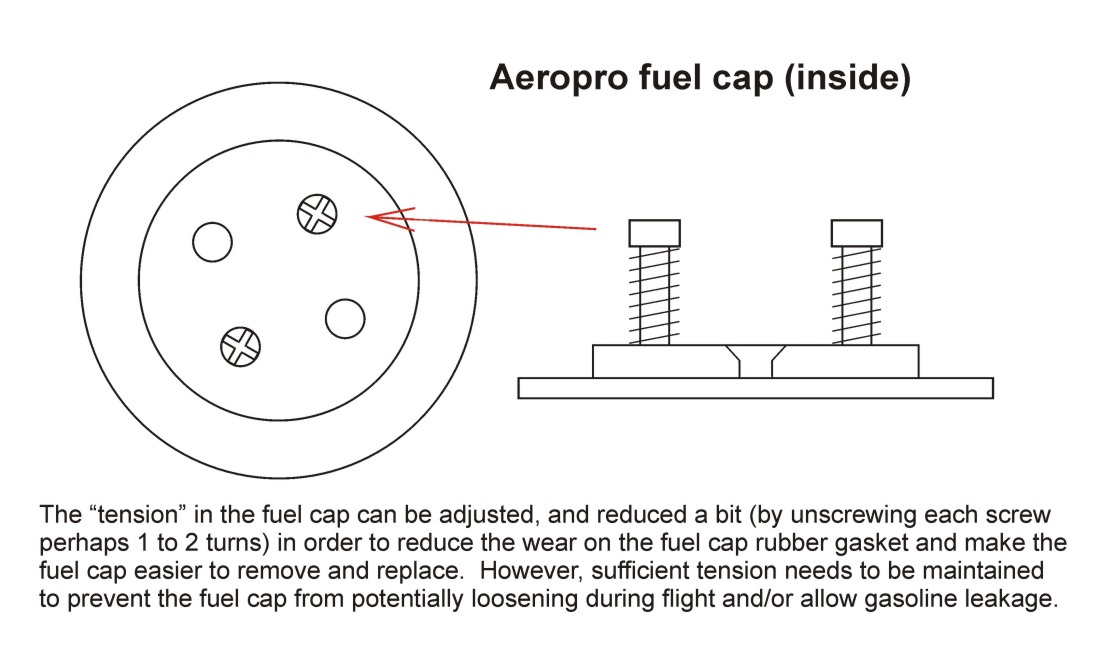
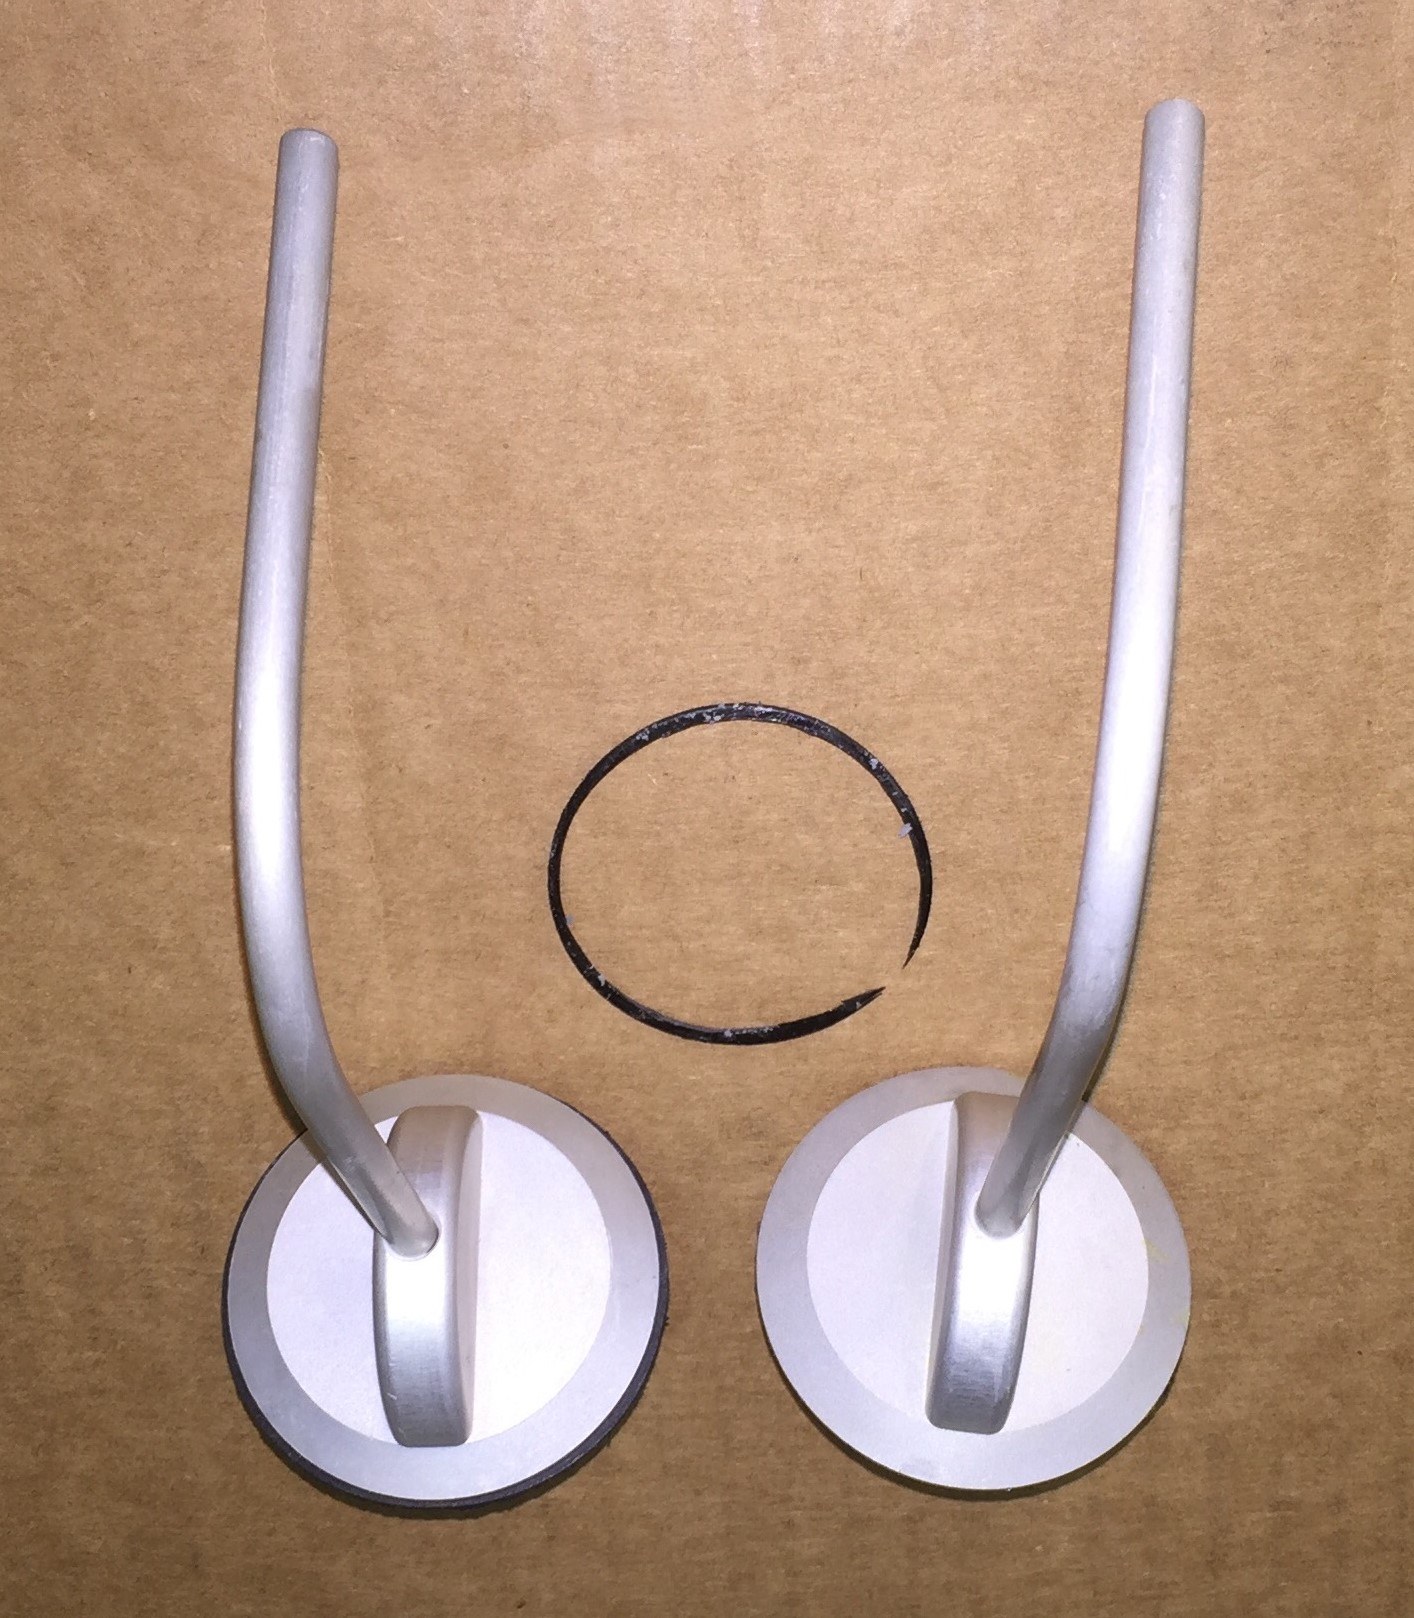
FUEL CAP RUBBER GASKET "TRIMMING"
The Aeropro fuel caps have rubber gaskets that generally are slightly larger-diameter than the fuel cap itself. The extra rubber is out in
the sunshine -- and this causes it to age and crack sooner. It has been suggested that trimming-off this protruding rubber might improve
the life of the rubber fuel cap gaskets, as shown in the photos above. HOWEVER! We do not recommend close-trimming of brand-new fuel cap
gaskets because they are likely to "shrink" a little bit in the short-term. If a new gasket is trimmed very closely, then it might shrink
so much that it would barely provide a proper fuel cap seal. But after awhile, and after the fuel cap gaskets are no longer "new", then
it might be worthwhile to trim the excess exposed rubber gasket a little bit.
|
|
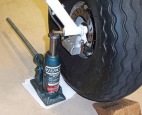
RAISING THE MAIN WHEEL OFF THE GROUND
: When needing to remove a main wheel to change a tire or inner tube or to work on the brakes, a
relatively easy way to raise and support a main wheel off the ground is to insert a long 5/16" (or 8mm) bolt or steel
rod into the hollow end of the axle on the back side, and then raise the main wheel off the ground using a jack of some sort.
The Aeropro axle flange nut requires a 27mm socket to remove. NOTE: Be VERY careful to not let the jack or anything
slip and somebody get hurt or the aircraft damaged.
: The axle flange nut has a tiny bit of the "flange" peened in place. The
axle nuts can usually be re-used a couple of times, but if you swap the right axle nut with the left axle nut, you will
usually find "untouched flange" and be able to use the axle nuts longer than otherwise. NOTE: Since the wheels
need to be removed at every Annual Inspection while doing brake caliper maintenance, another otherwise when changing a
tire, the Aeropro axle flange nuts will eventually need to be replaced and we keep them in stock.
|

|
MICROFIBER TOWELS FOR EASY CLEANING
Microfiber towels of medium size (about the size of a washcloth) are available in economical packages (at
Walmart or most auto parts stores) and are great for most aircraft cleaning purposes. Use the microfiber
towels with plain clean water -- soap or other cleaning products are normally not needed. Most aircraft
cleaning can be done by rinsing well with plain water, and then wiping down with a damp microfiber towel.
For windshields, it is especially important to rinse thoroughly with clear water to allow most dust and dirt
to rinse away and to soften bugs -- then, wipe with a wet microfiber towel to gently remove bugs and dirt.
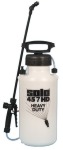
Then, wipe with a slightly-damp microfiber towel to complete the cleaning. If your hangar doesn't have water
readily available, it can be very helpful to keep on hand a small (3 or 5 gallon) water sprayer tank to use
for rinsing the windshield and other areas of the plane as needed. We wet (soaking wet) microfiber towel is
excellent for cleaning the prop blades. When a microfiber towel is a little dirty, don't use it -- instead,
wash it in your washing machine back at home. When it is necessary to give your whole aircraft a good general
washing, we recommend using Woolite (yes, the laundry detergent used for washing delicate fabrics) because it is
not a harsh (alkaline) soap so it doesn't damage aluminum or discolor metal coatings and it rinses clean in cold water.
|
|

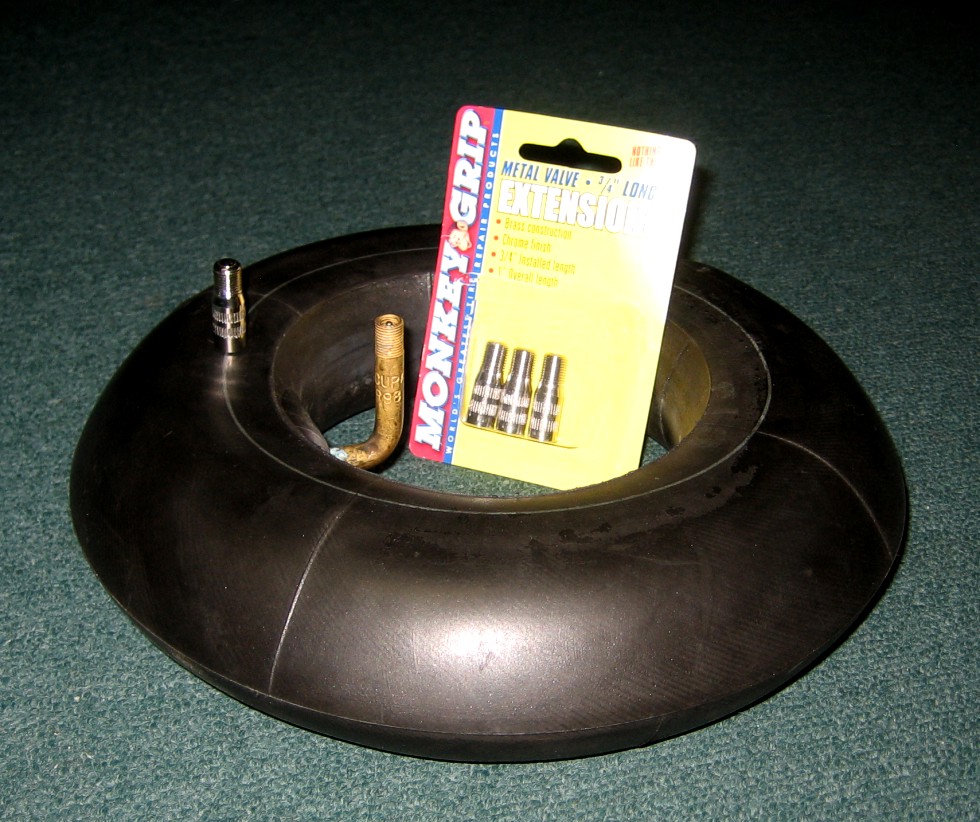
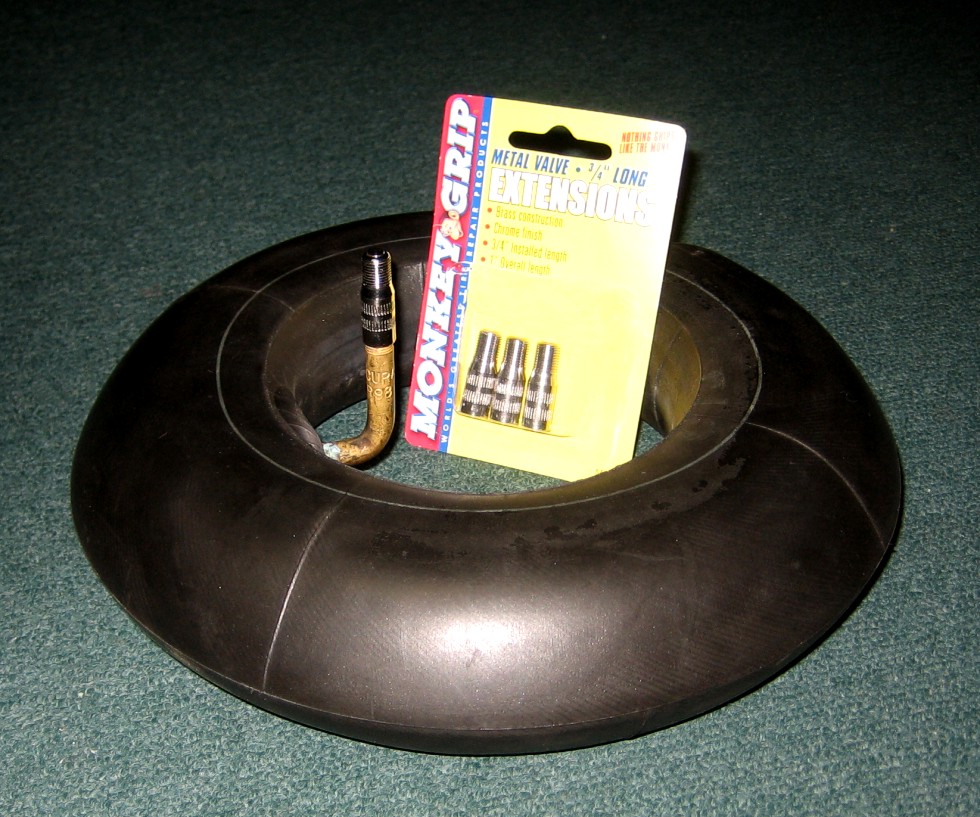
 INNER TUBE VALVE STEM EXTENSIONS
Our front tire is 12x400 with an inner tube with a 90-degree valve stem. The original Aeropro inner tube has a fairly long valve stem (as shown in the
photos) -- however, it still is "barely long enough" to be able to conveniently and reliably get an air pressure gauge or chuck onto. Domestically-available
12x400 inner tubes usually have an even shorter valve stem. So, it is helpful or even necessary to use a "valve stem extension" as shown in the photos.
The "Victor M8838 3/4" Metal Valve Extension" is what we recommend (though a shorter inner tube valve stem might require the 1-1/4" extension). We try to
keep both of these in stock and they are also readily available through Amazon.com However, when adding a valve stem extension it is necessary to rotate
the front tire and make sure the valve stem extension does not hit the wheel pant.
|

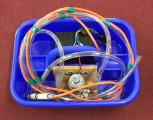
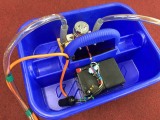
PORTABLE 12V FUEL TRANSFER PUMP
We have made a "12v fuel transfer pump" so we can gas-up our aircraft without having to do it with plastic
fuel cans carried up a step-ladder and with the risks of spilling fuel or dropping a tank and damaging a wing, or a mis-step
going up or down the ladder and getting hurt. At best, a fuel tank with 5 gallons of gas weighs more than 30 pounds and it is
awkward and can be a strain to fuel-up this way. And, if your wing tank is low, it will take two trips up and down the ladder
to fill-up each wing tank. Instead, an electric fuel pump can make it easier and we believe overall safer. Of course, almost
nothing is perfectly safe when dealing with gasoline (and ladders). For details about our 12v fuel transfer pump and with some
important warnings and cautions about using this sort of pump, as well as other warnings and advice about fueling our aircraft,
please see our document at...
12v-portable-fuel-pump.pdf
PLASTIC GAS CAN INFORMATION
NOTE: What follows below is some information about using plastic gas cans to fuel-up your aircraft, with several
possible ways of doing this. But we overall recommend to NOT carry a heavy gas can up a ladder and instead if possible
use an electric fuel transfer pump as was described in a previous section on our Aerotrek-tips web page. But if you
don't have an electric fuel transfer pump and must gas-up using plastic gas cans, we have some information and advice
about doing this...
If you must carry gas up to the top of your wing, we think it might be the best recommendation is to use
the "SureCan" plastic gas cans. We overall think they are probably the best gas cans -- if you must climb up on a ladder
and position/hold a gas can on or above the wing to put gas into your wing tank. You can see the "Sure-Can" plastic gas
cans on the company web site at... www.surecanusa.com With these cans, you can sit
the can on the wing (best to sit the can on a thick folded towel to avoid scuffing your paint and to reduce chances of denting
your wing or damaging the paint or fabric). Then, the spout can be put into the wing tank opening, as shown in a photo at...
surecan-1 Or, the SureCan flexible spout can be
removed and then the SureCan can be position with the fuel flowing directly into the wing tank, as shown in the photos at...
surecan-2
surecan-3
surecan-4
surecan-5
All things considered, if you have to gas-up your plane by carrying a heavy plastic gas can up to the top of the wing, then we think
that using the "SureCan" may be the safest and most reliable way to do it. Otherwise, if you are "tipping" a gas can to pour fuel into
your wing tank, it is just too easy to spill fuel, overflow your wing tank, or drop your tank and damage the wing, or have an accident
while trying to stand up on a stepladder and hold a heavy gas can in place.
Another recommendation... The plastic gas cans usually have 5- or 6-gallon capacity. That's fine, but 6 gallons of
gasoline weighs about 36 lbs and even 5 gallons weighs about 30 lbs. This is a lot of weight to carry up a ladder, especially if you
are using a can where you have to tip the spout into the wing tank opening. I strongly recommend only putting 4 gallons of gasoline
in these cans, so that the weight is about 24 lb (plus the slight weight of the plastic gas can itself, of course). Only putting 4 gallons
of gasoline in the plastic gas can also means you can tip it over further before gasoline starts coming out of the spout -- making it
easier to get the spout into the wing tank opening without spilling gasoline. Also, dealing with a lighter gas can makes it less likely
that you might drop it and bang it down onto the wing and damage it. Obviously, if you only put 4 gallons in the gas can you need more
cans to do the same job -- but it is well worth it.
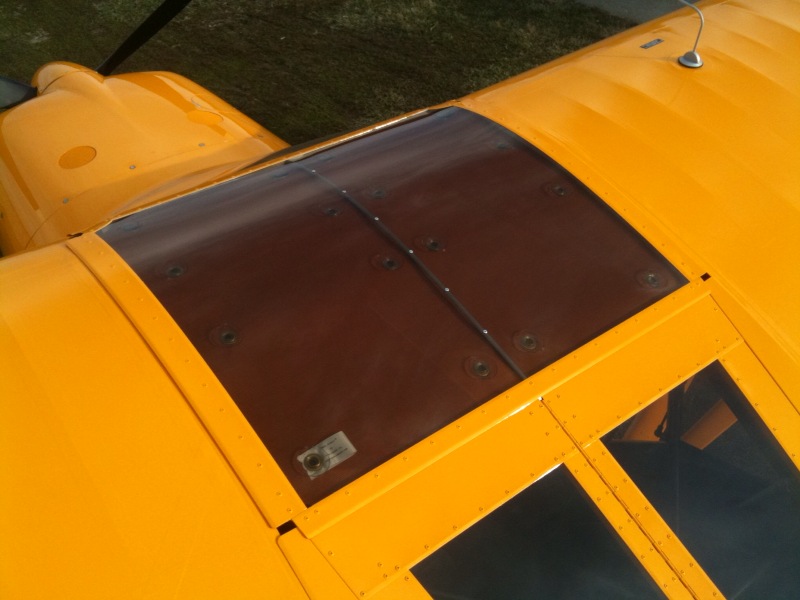
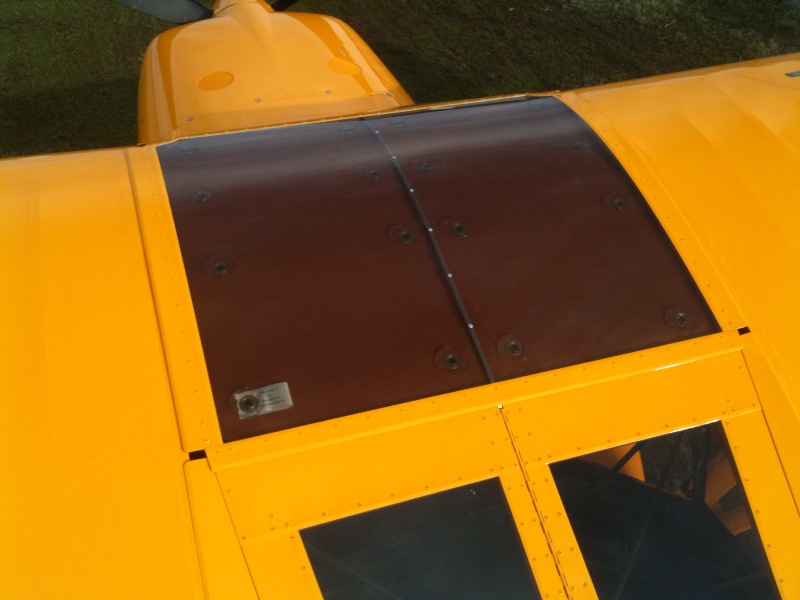
Finally, even with great care it is possible to spill some gasoline. Because of this, we always put
a clean dry bath towel between the wing tank opening and the skylight -- to help block/absorb gasoline if there is a spill.
Also, we keep some paper towels up there on the wing so we can immediately wipe-up any drops of gasoline that spill. It is essential
to prevent gasoline from ever touching any polycarbonate material, and this means our skylights and doors and the little windows to
the rear of the doors. Also, be sure both doors are shut before refueling, to further reduce chances of even a tiny droplet of
gasoline getting onto the clear doors -- even the tiniest bit of gasoline will damage the polycarbonate and cause staining
and cracking around the rivets. The polycarbonate panels can be replaced with some low-cost 1/16" thick polycarbonate and
some aluminum rivets, but it is several hours of meticulous work and it is best to completely prevent this damage.
|
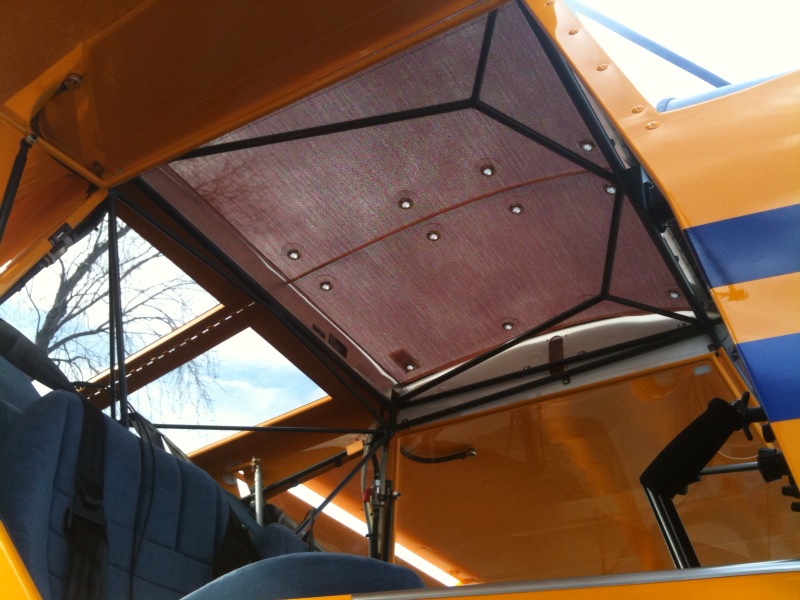
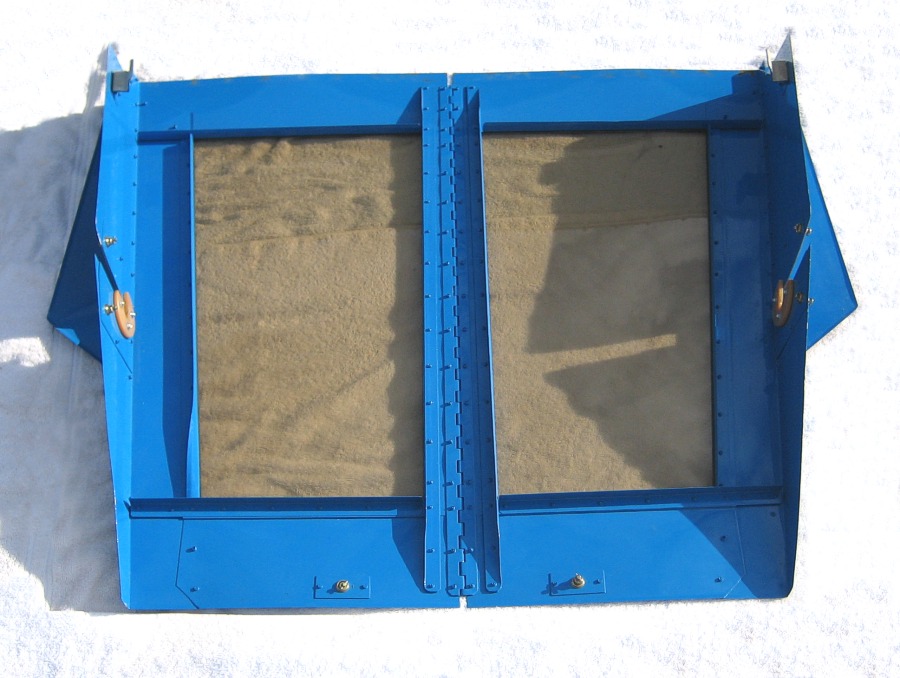
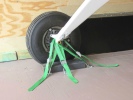
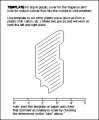
REDUCING COCKPIT AIRFLOW
Because our aircraft have folding wings, there are a number of "openings" in our cockpit and luggage compartment area that allows
airflow in the cockpit. This is OK in warm conditions but not good when it is cold outside. To reduce this problem, one area where
this airflow can be blocked is where the flaperon control arms go through the turtledeck (left and right sides). Shown on the left
is a design that works well. It can be cut with scissors out of very thin milk jug (or similar very thin) plastic. Then, easy to
slip in place and it will block the airflow in this area very effectively.
The drawing on the left is the design made by Andy Hayden. It is usually fairly easy to find a thin plastic of some sort that will
match the aircraft.
|

|
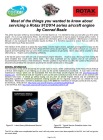
ROTAX 912 MAINTENANCE ARTICLE
Conrad Beale is a highly-experienced Rotax technician in the UK and he has written an article with a lot of details about Rotax maintenance, service and
operation. Most of the information is for the Rotax technician and not for use by the aircraft owner -- but there still is a lot of very interesting and
worthwhile information for the aircraft owner (and in any event, the more the aircraft owner knows and understands his engine, the more likely he will be
sure to get proper maintenance). This article is at... Conrad Beale 912 article.
|
|

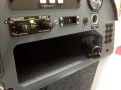
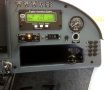

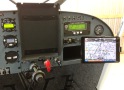
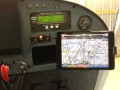
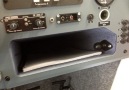
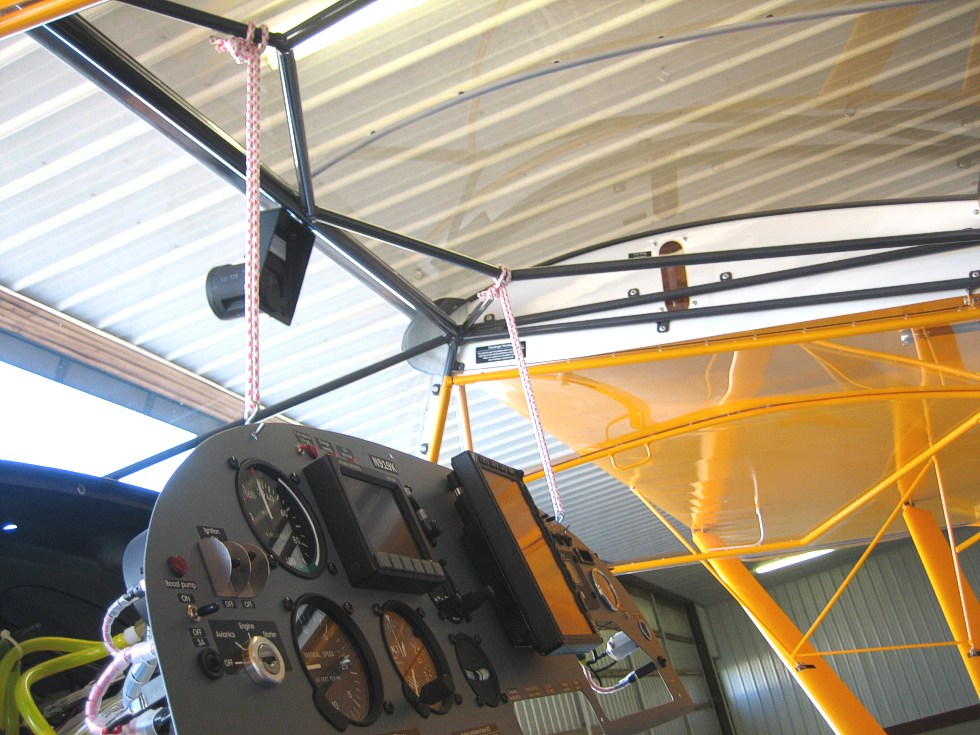
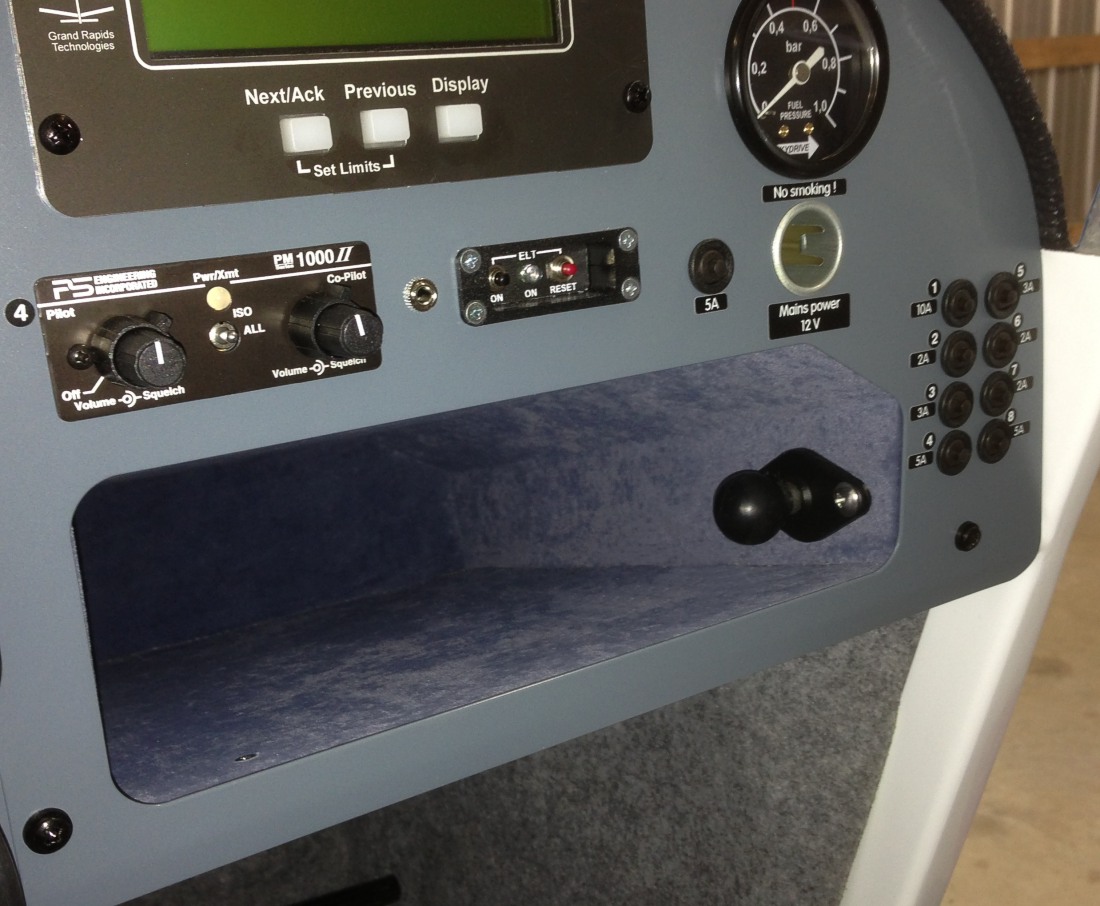
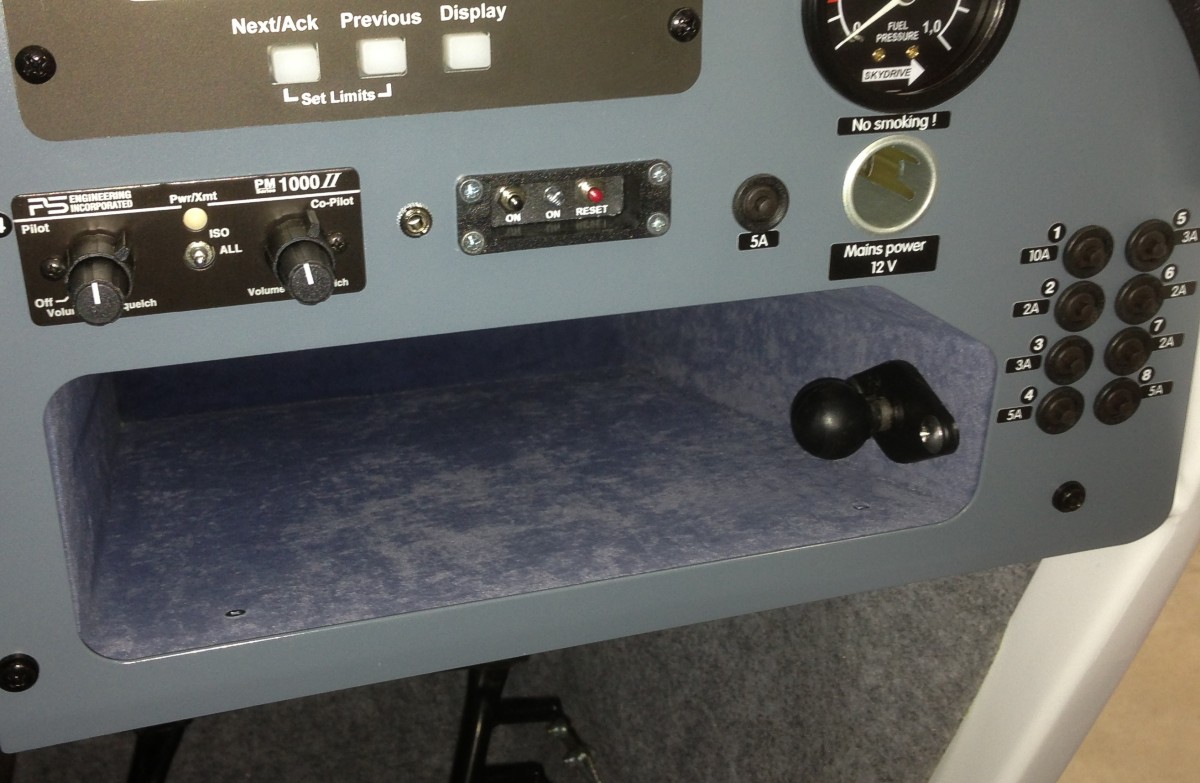
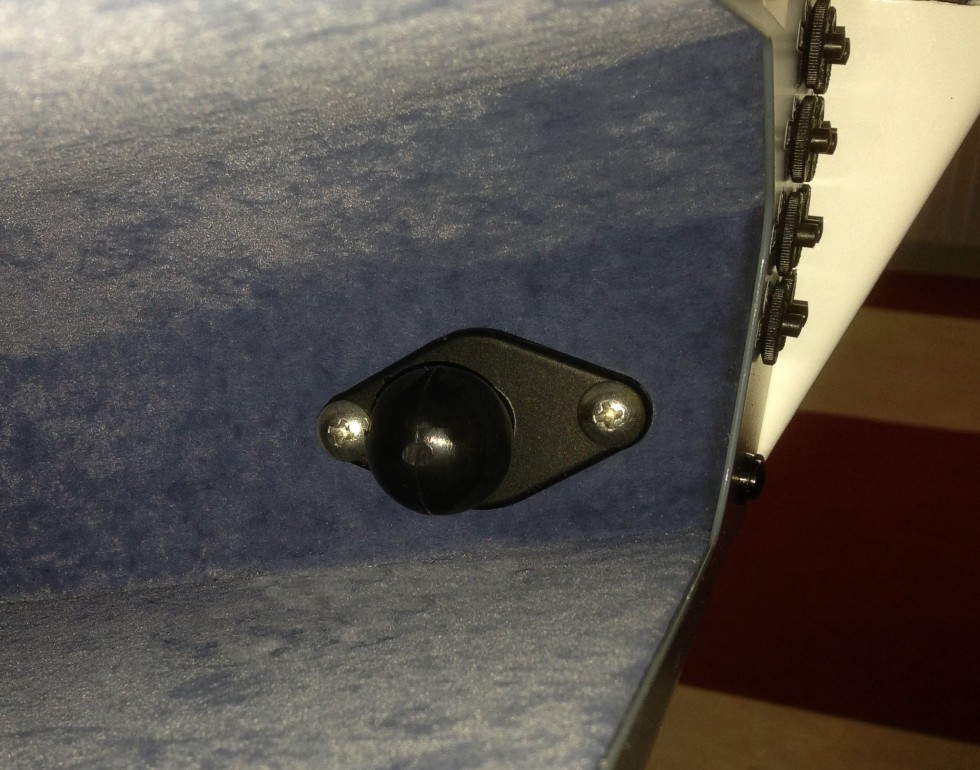
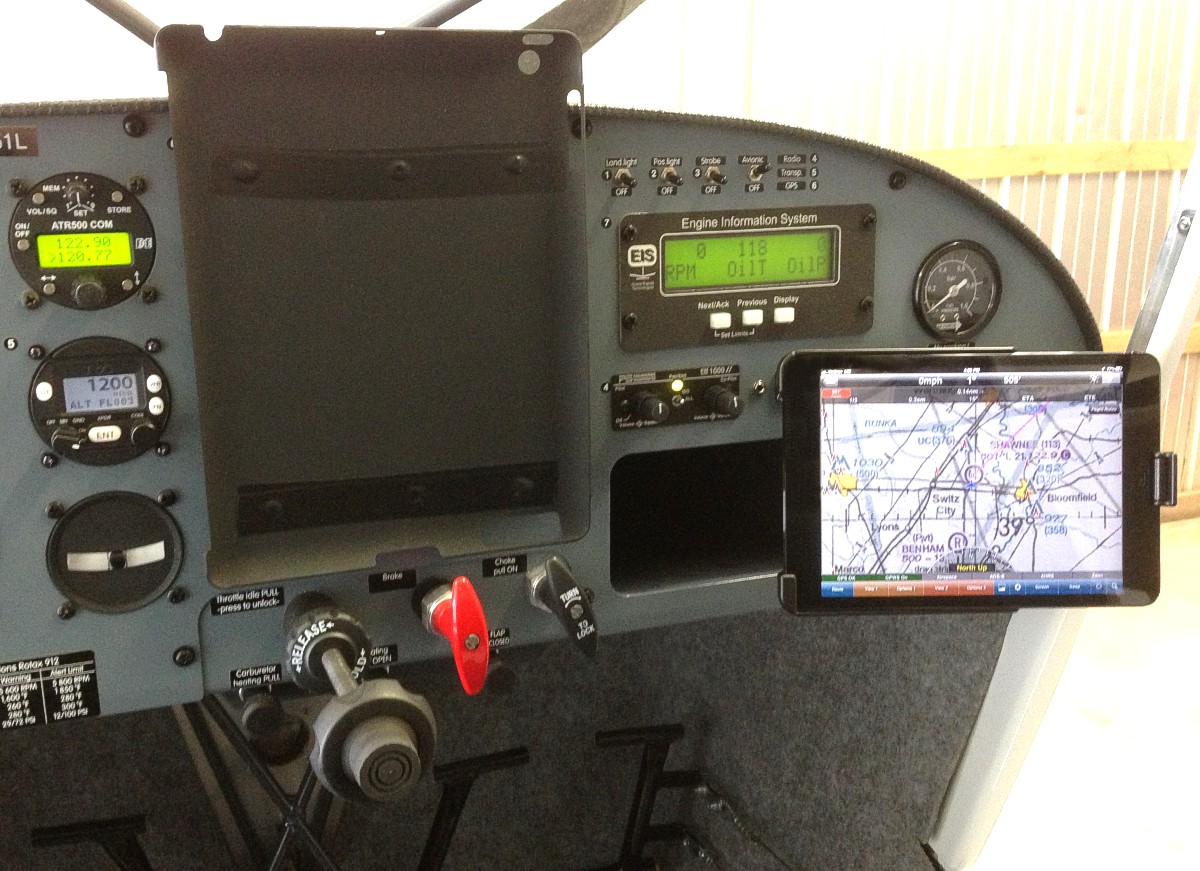
MAPBOX RAM-MOUNT -- FOR iPAD MINI OR OTHER DEVICE
Many of our aircraft owners have a large-screen aviation GPS or full-size iPad mounted in the center of their panel, and this works very well. However, more and
more pilots are using the iPad's and the smaller iPad Mini has a lot to offer. If the pilot wants a very handy removable mount for the iPad Mini, this can be
done by installing a RAM-Mount "ball" inside the right-side of the mapbox, as shown in the photos above. With this mount, the iPad Mini is on the far-right side
of the panel and sort of blocking the mapbox and blocking access to the circuit breakers, but this still may be worthwhile for some aircraft owners. The RAM-Mount
ball can be installed as shown where it will not interfere with the POH being kept in the mapbox. However, it is necessary to take great care if installing a
RAM-Mount ball in this location, because the screws and nuts will be very close to the circuit breakers and they must be kept clear (though this will vary depending
on different models/years of our aircraft). Further note: this "mapbox RAM-Mount" could also be used for many other devices -- smaller aviation GPS units (such as
the Garmin aera) or even an iPhone could be mounted using this "Mapbox RAM-Mount."
|


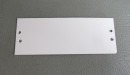
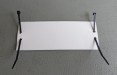


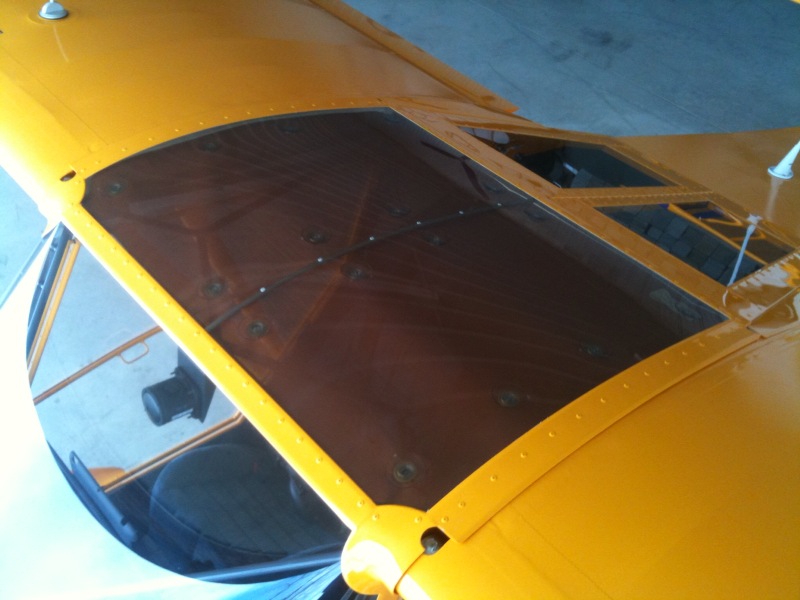
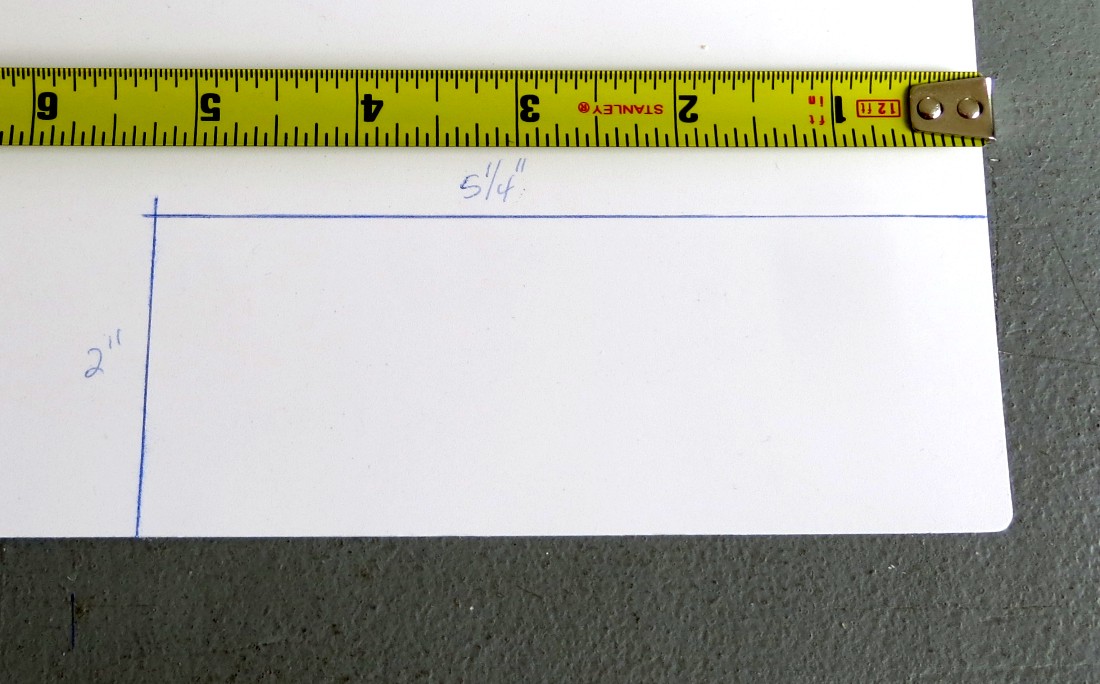
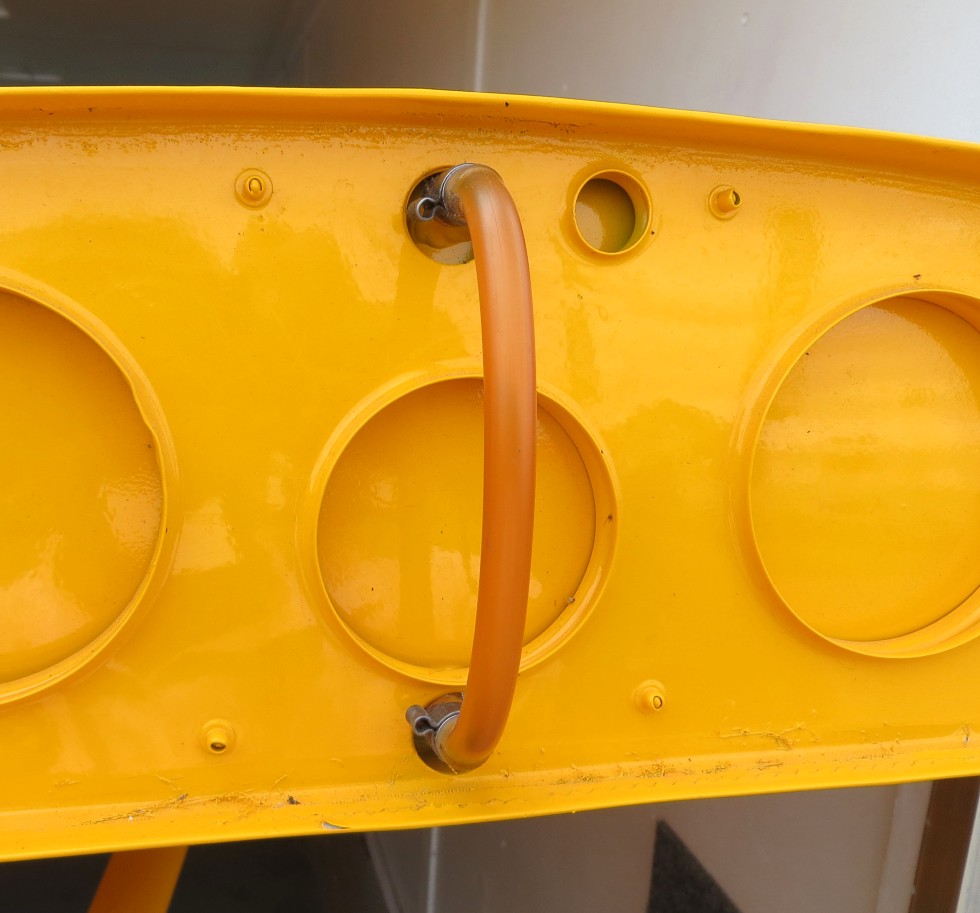
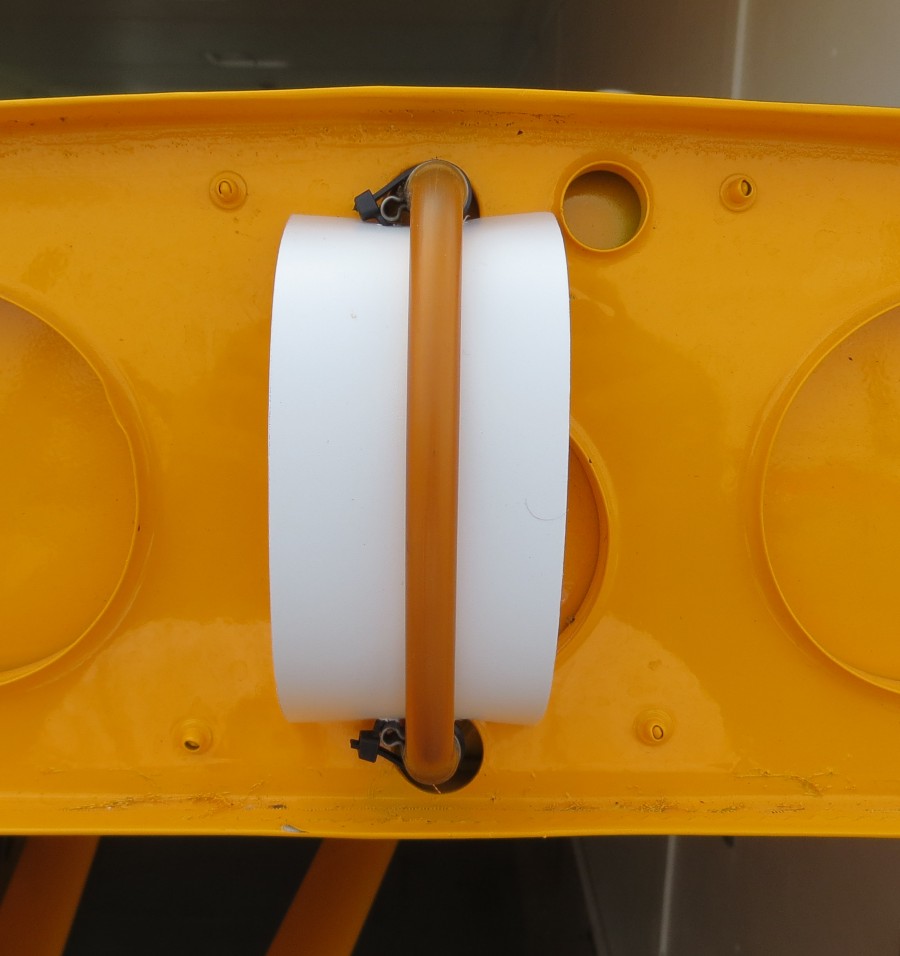
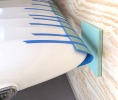
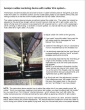
IMPROVED FUEL LEVEL VISIBILITY
With our white aircraft, you can usually see the fuel level in the fuel sight tubes as long as they are
in good condition and still reasonably clear (see "REPLACING FUEL LEVEL SIGHT TUBES" up above) but with
our yellow and all other color aircraft it can be difficult to see the fuel level. To greatly improve the
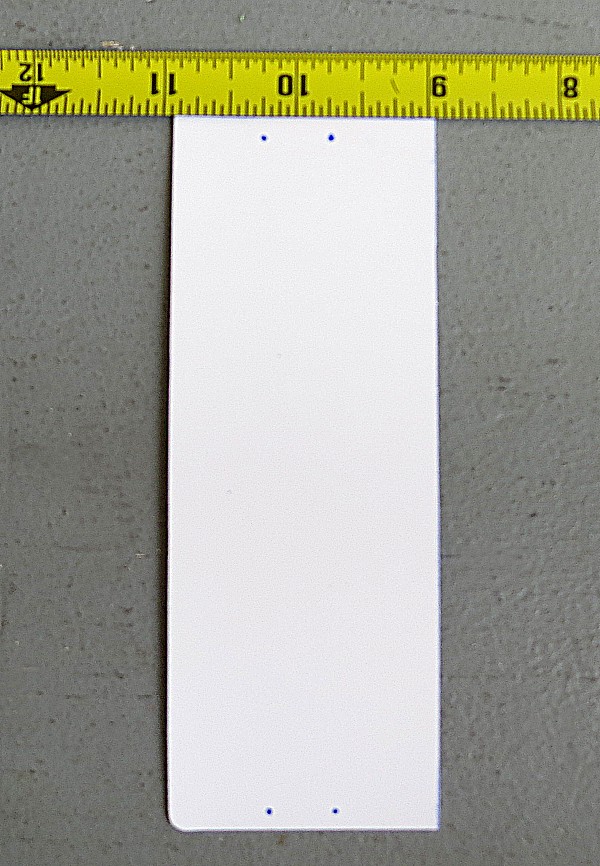
visibility of the fuel level (even in our white planes), we recommend installing a piece of very thin white
plastic behind the fuel level sight tube. This is shown in the photos above. You need a piece of thin
white plastic (we cut-up a thin white plastic document binder that we can find at a Staples or Office Max
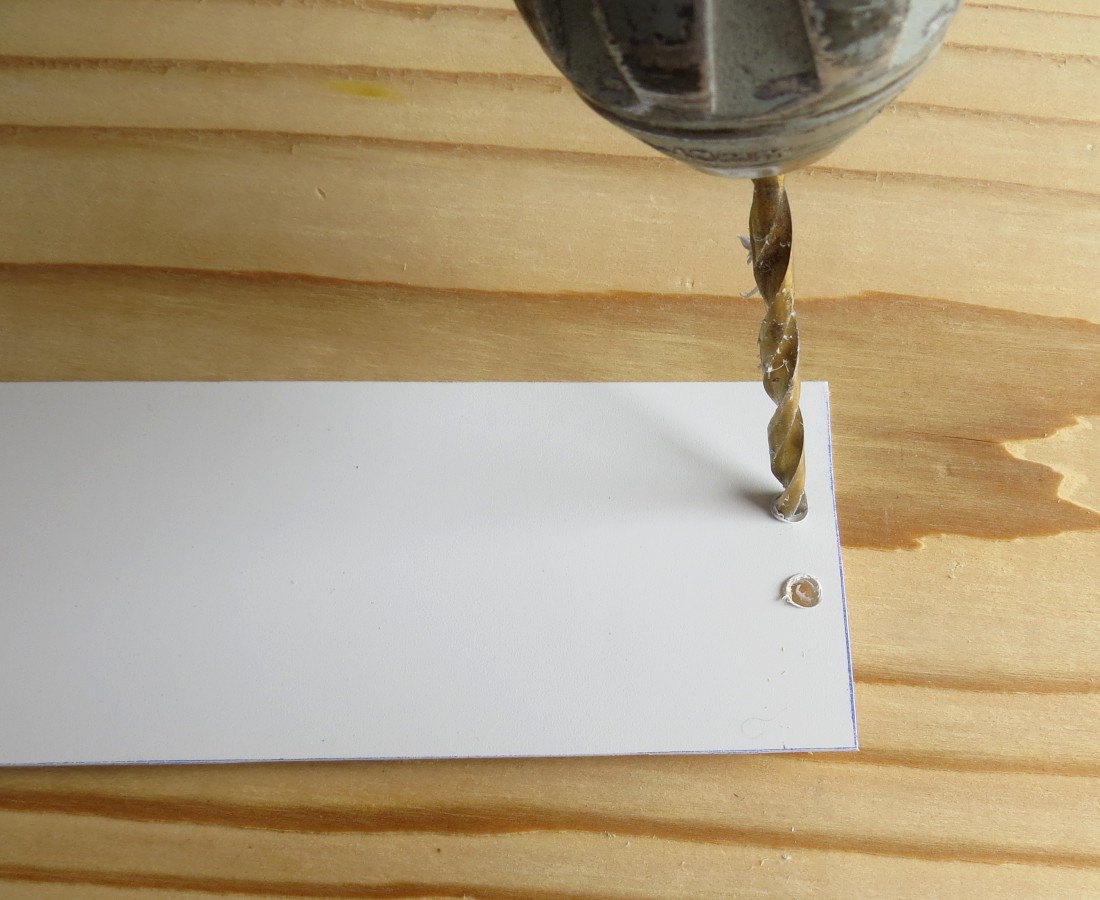
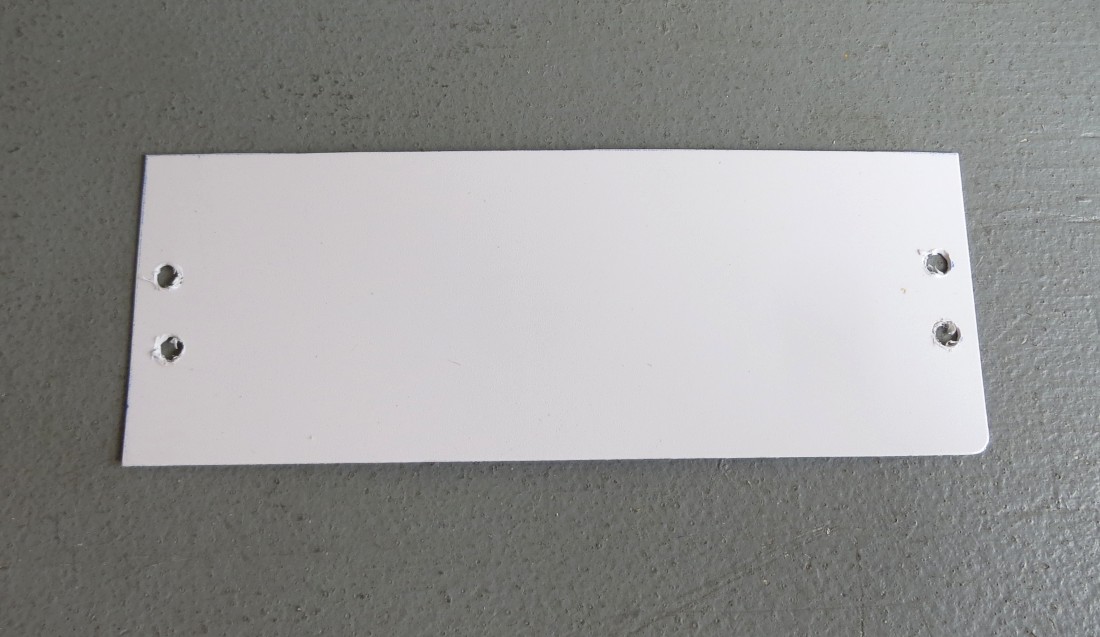
or similar office supply store) and cut a piece of plastic 5.25" x 2". Then, drill or otherwise cut a pair
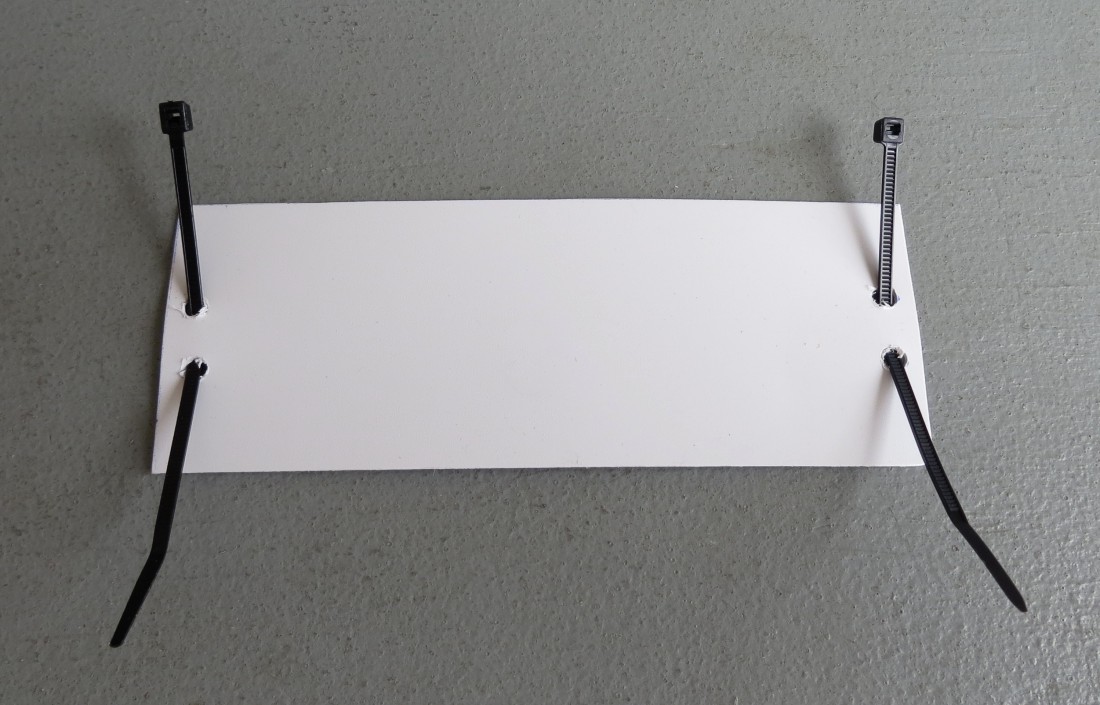
of holes (1/2" spaced apart) near the top and bottom of the plastic piece. Then, install using two small
plastic cables ties as shown in the photos above. FURTHER NOTE: Another good source of white
plastic is those low-cost plastic "FOR SALE" (and similar) yard signs available at Walmart and most
hardware stores for about a dollar. Just cut to appropriate size with scissors, and use the white back
side of these very thin-plastic signs. And... even though in the photos above we are showing the white
plastic pieces being secured in place with cable ties, just a simple appropriate-size card (perhaps about 4.5"
tall and about 4" wide) will usually just pop in place and stay there without even bothering with cable ties.
|
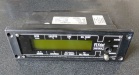
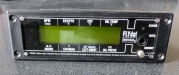


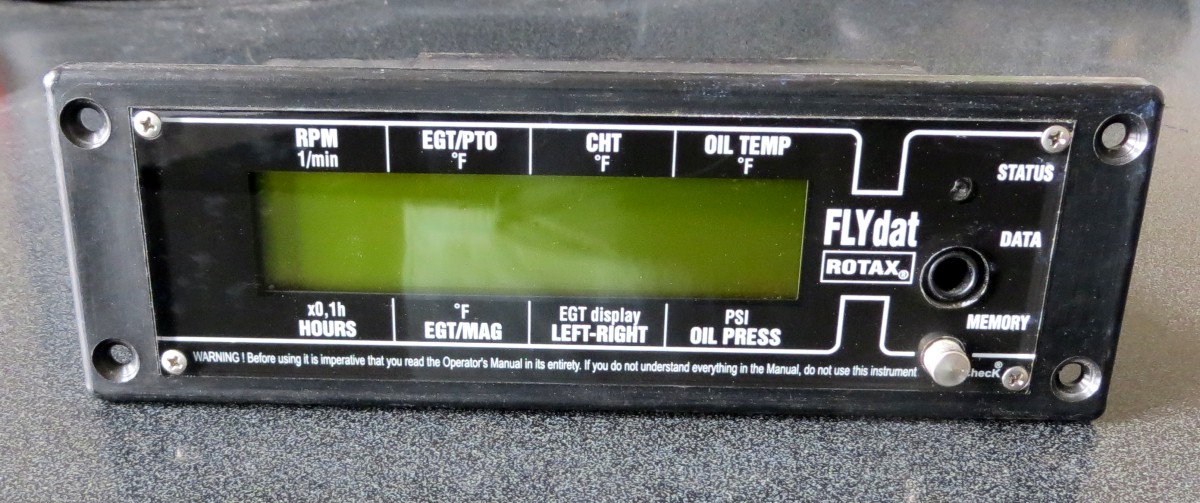
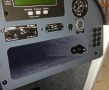
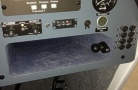
FLYDAT RESETTING
Our aircraft were equipped with the Rotax "FlyDat" engine monitor until January 2010 (when starting with aircraft
s/n 29809 we began using the "EIS" engine monitor manufactured in the U.S. by Grand Rapids Technologies). The FlyDat is actually a
good and generally durable engine monitor but it does have what can be an annoying problem. When one of the engine parameters is
exceeded (such as too-high or too-low oil pressure, etc.) this number will "flash" as a warning. That's fine, but then the next time
you start the engine (and the FlyDat comes back on) it flashes a "SERVICE" warning. To get rid of the SERVICE warning, you need to
be pushing in on the silver button (on the front of the FlyDat) while turning-on the unit. This "resets" it. That's fine, but after
doing this about 10 times the FlyDat will no longer "reset." Then, you are stuck with the annoying SERVICE warning every time you
start the engine. Until now, the only way to "clear" the non-resettable SERVICE warning was to take or send the FlyDat to Lockwood
Aviation in Florida and they could connect it to a special computer program and then reset it. (but even after this, once the owner
has pushed the silver button and "reset" the FlyDat more than 10 times you again have the annoying SERVICE warning).
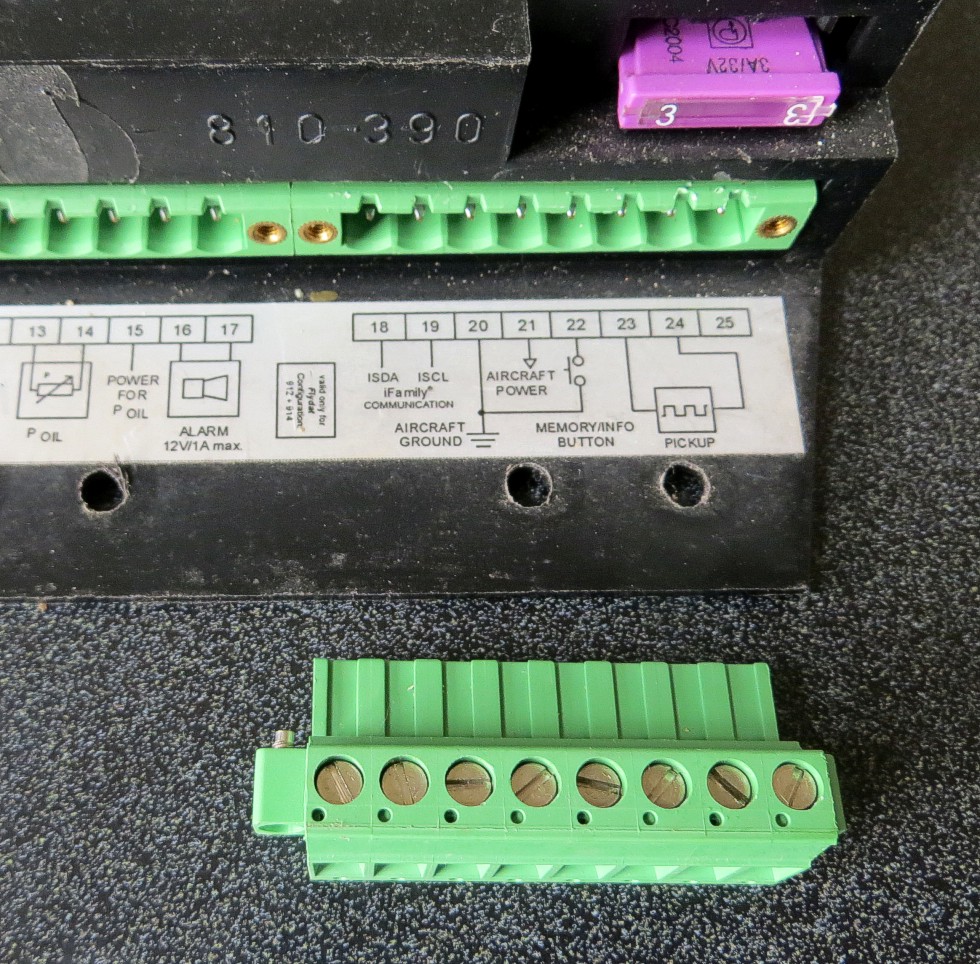
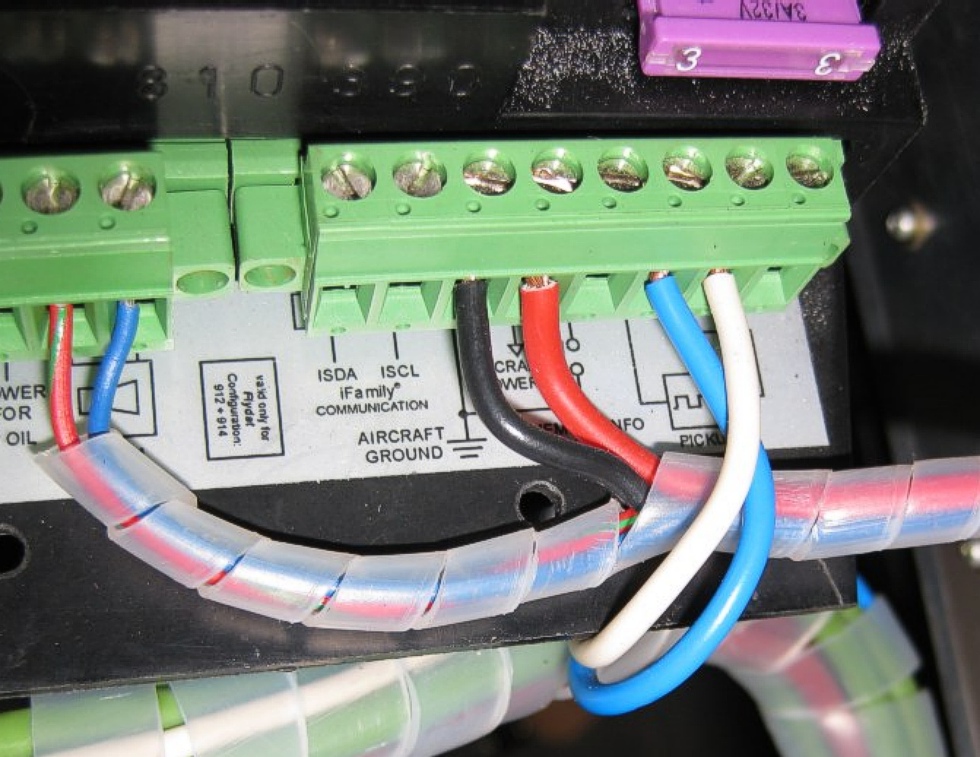
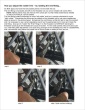
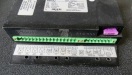
One of our aircraft owners, Russ Miley, has found that is the FlyDat can be reset by making a connection between
pin 22 and pin 20 on the back of the FlyDat (please see the photos above) and then turning-on the FlyDat. This should reset the
FlyDat (and then allow the silver button on the front of the FlyDat to again work as intended). Then... if/when you have used the
silver button to "reset" the FlyDat more than 10 times (and it will no longer "reset"), just make the connection between pin 22 and
pin 20 again, turn the FlyDat on, and this should reset the FlyDat.
We have tried "resetting" one Flydat with this method and found that it works just fine. A temporary connection
between pins 20 and 22 can be made with a length of wire, of course, or perhaps even more conveniently with a bent paper clip or a
bent cotter pin or something like that. Now, if an aircraft owner is concerned that he may need to "reset" the FlyDat perhaps again
in the future, he could installed two wires and connect to a small switch (perhaps tucked up behind the instrument panel in a place
where it would not interfere with anything but be accessible as needed) to be able to reset the FlyDat without having to pull the
instrument panel out.
please note: removing and reinstalling the instrument panel and working on the FlyDat is not "owner
maintenance" and only should be done by a qualified aircraft mechanic
|

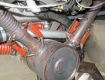 ROTAX EXHAUST SPRINGS
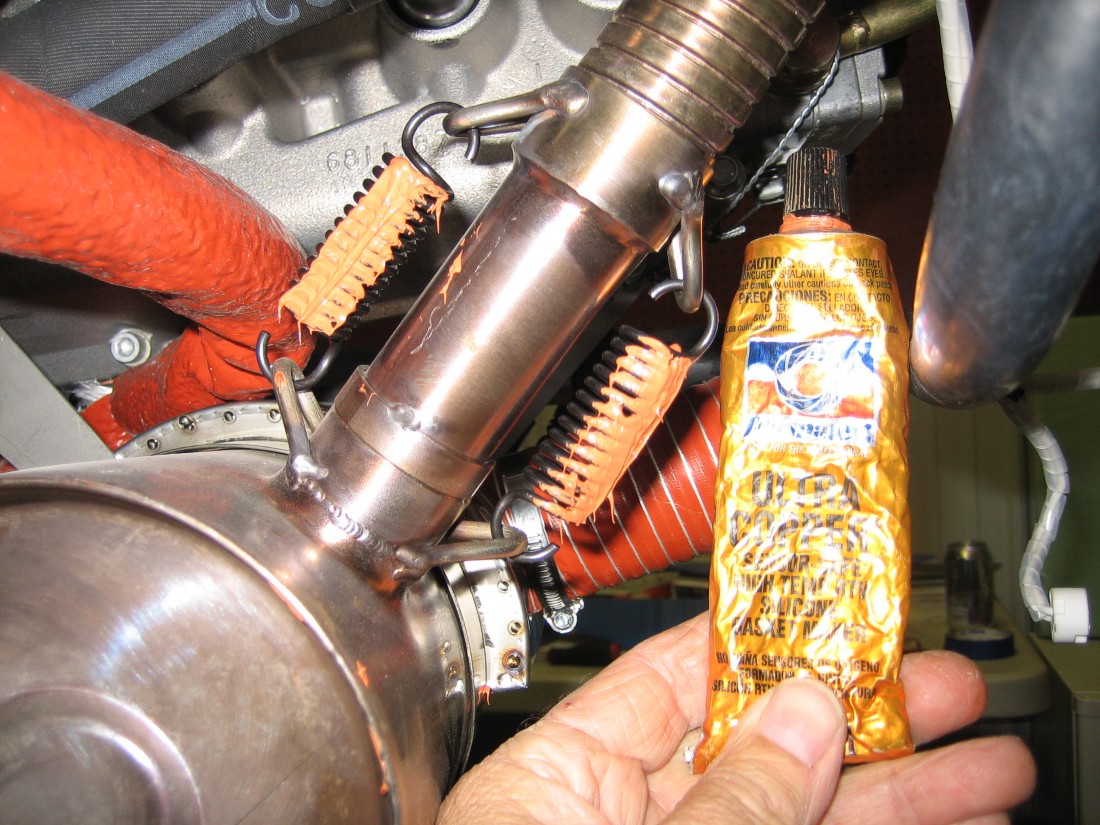
The Rotax exhaust springs should last for many years, but it seems that there is a fairly high percentage of Rotax exhaust springs that
fail (break) perhaps very soon (or within the first year). This is why it is important to frequently look to see if you have any broken
exhaust springs, and replace as needed. Another worthwhile thing is to put a thick bead of high-temperature silicone sealer on the
exhaust springs. This probably dampens vibrations a little and make them a little less likely to break. On our Inspection Checklist,
in the Rotax engine inspection section, we specify that this should be done at the 25-hour inspection (or at the Annual Inspection if it
has not already been done).
|

 WINTER FLYING -- BLOCKING-OFF SOME OF THE COOLANT RADIATOR AREA
Our aircraft have an inflight-adjustable oil cooler flap (standard since late-2010, and an option for most earlier planes), which can
completely block airflow through the oil cooler and this allows for quicker warm-ups and allows for higher oil temperatures during cold/Winter
conditions. However, even with the oil cooler flap, the twin coolant radiators provide a great deal of engine cooling and the engine can still run
cooler than we want (generally we want to see engine oil temperature at 190F to 200F). To block-off some of the cold air going through the coolant
radiators, Karen Smith up in Canada put some small strips of aluminum tape on her coolant radiators as can be seen in the photos above. It is
very important to note that typical duct tape or other tapes must not be used, because they will harden and be almost impossible to remove
cleanly. Karen reports that pure aluminum tape (available at most hardware stores) works just fine and even after a Winter of use the aluminum tape
will come off nicely without damaging the radiator paint (but remove the tape when it is nice and warm, because then the adhesive will release more
readily). When putting some tape on the radiators to increase operating temperatures, the pilot must be very careful to monitor temperatures
(especially during climb) and make sure that temperatures do not go too high. Also, when weather gets warmer, don't forget to remove the radiator tape.
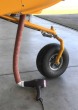
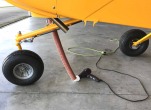
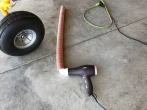

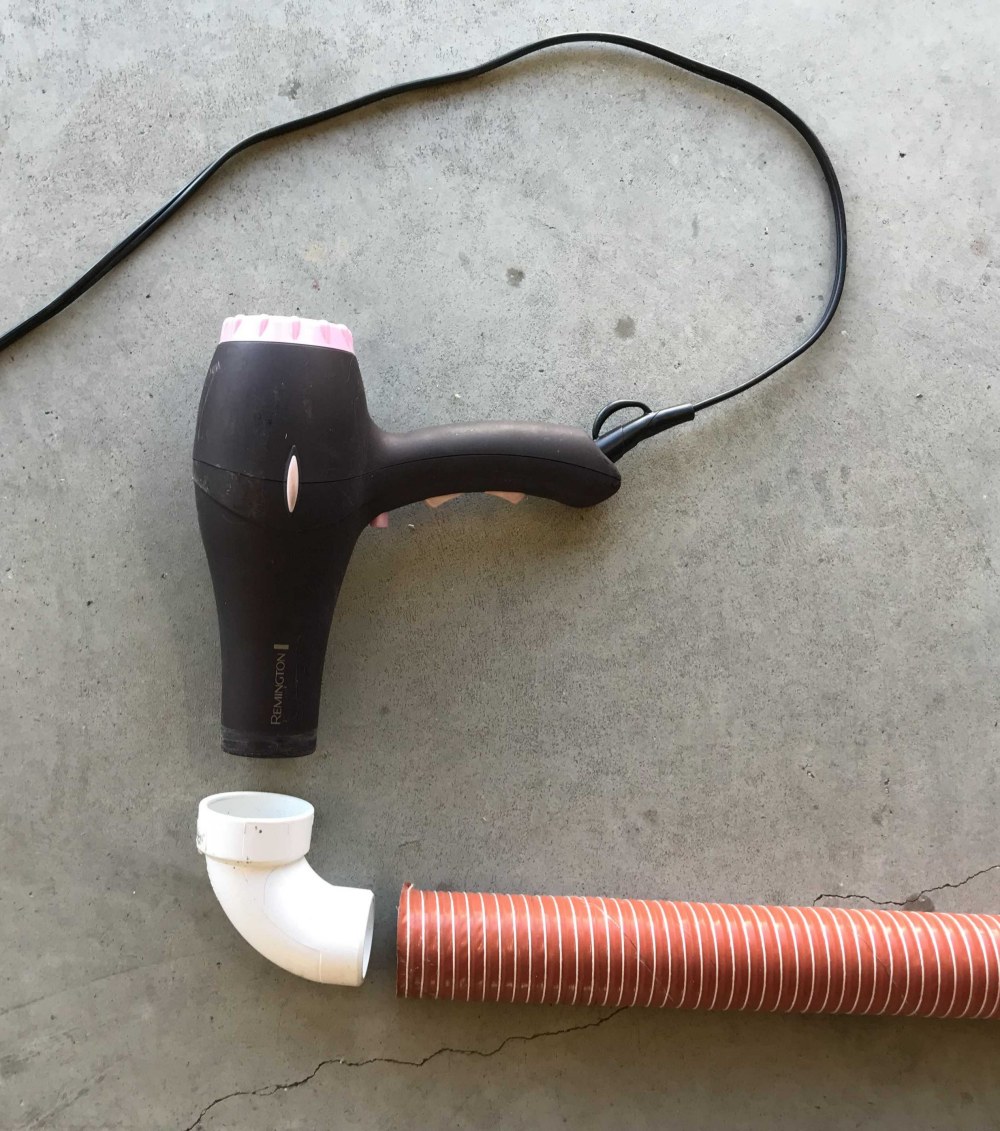
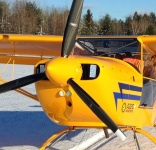
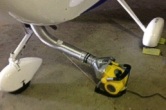
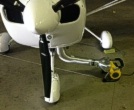
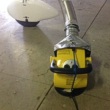
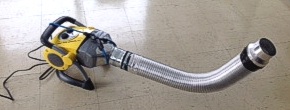
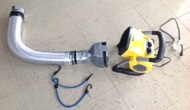
"HAIRPLANE" HEATER
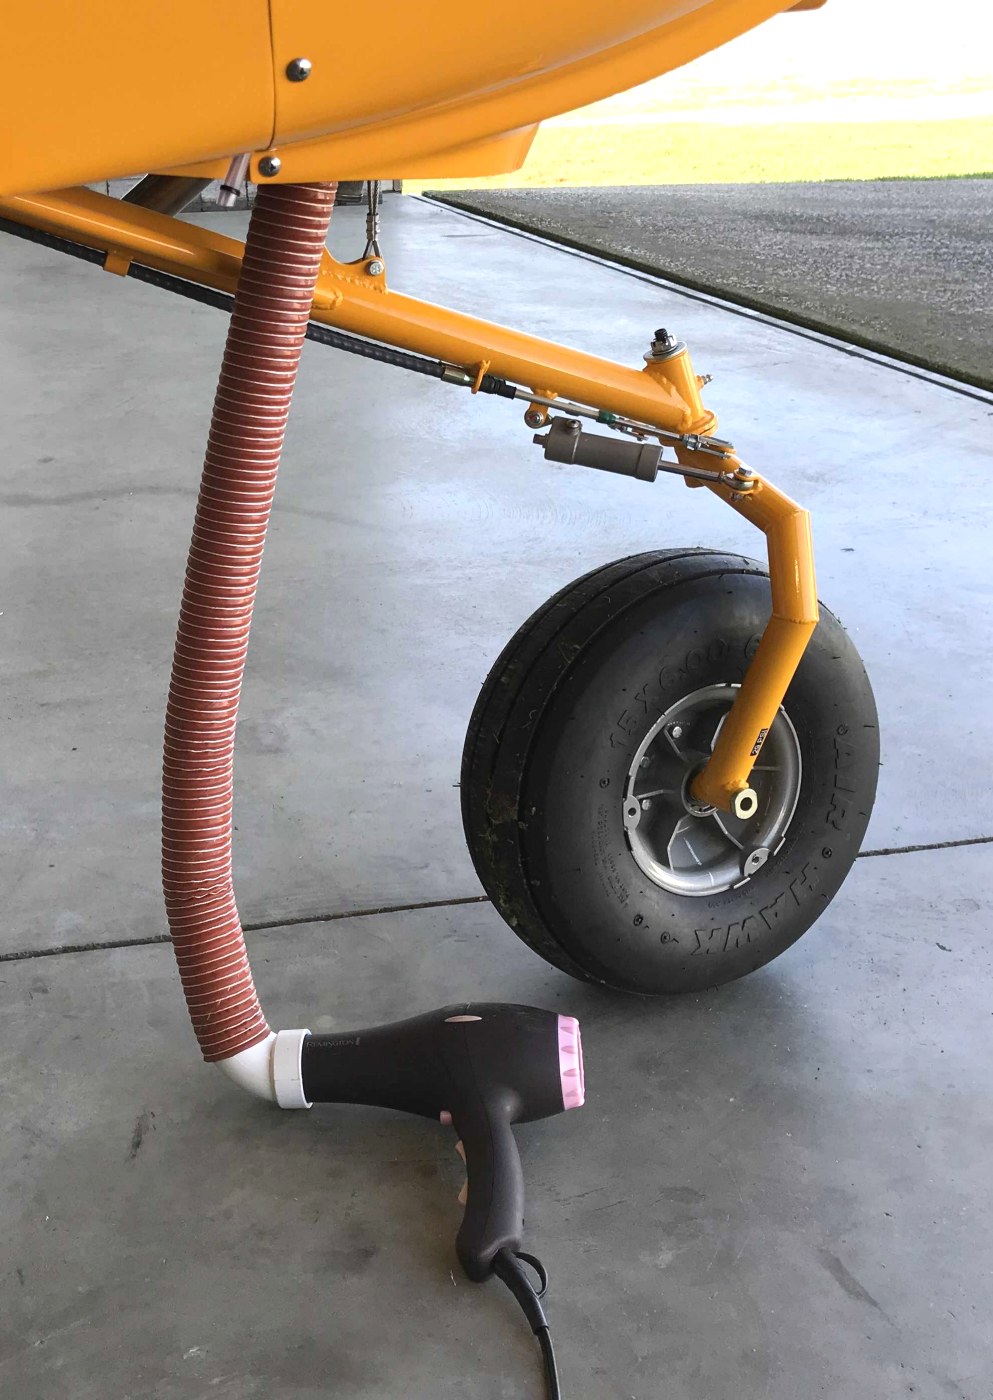
For some years, we've been using a hairdryer with a 90-degree PVC fitting and a SCAT tube as shown in the photos to
preheat our engines. It is pretty easy to find a good name-brand hairdryer that has a tapered end where a PVC fitting will slide on
and hold in place. We don't leave any electric preheater unattended, but we think a good quality hairdryer is pretty safe as we are using it --
especially because the hairdryer will be in a cold environment, and sitting on a bare concrete floor and with a SCAT tube carrying the hot air
up into the engine compartment. This is a very low-cost and easy to make preheater. We put a blanket over the top of the engine cowling for
insulation and we tuck the blanket around to seal the openings in the front of the cowling.
NOTE: An electric preheater can put a lot of heat into the engine compartment and be very worthwhile, and are a benefit even
if you can only use them 15 to 30 minutes before starting the engine. But the engine is fairly large and heavy and the insides of the engine
aren't going to warm-up very quickly. If we know the day before that we are going to go flying on a cold day, we will hang a "trouble light"
(such as in this photo) with a 75w or 100w light bulb to put a
small but steady heat into the bottom of the engine/engine-compartment overnight or longer. This doesn't cost much electricity but gets a
surprising amount of heat into the engine and makes starting so much easier and it's better on the engine and provides quicker warm-ups.
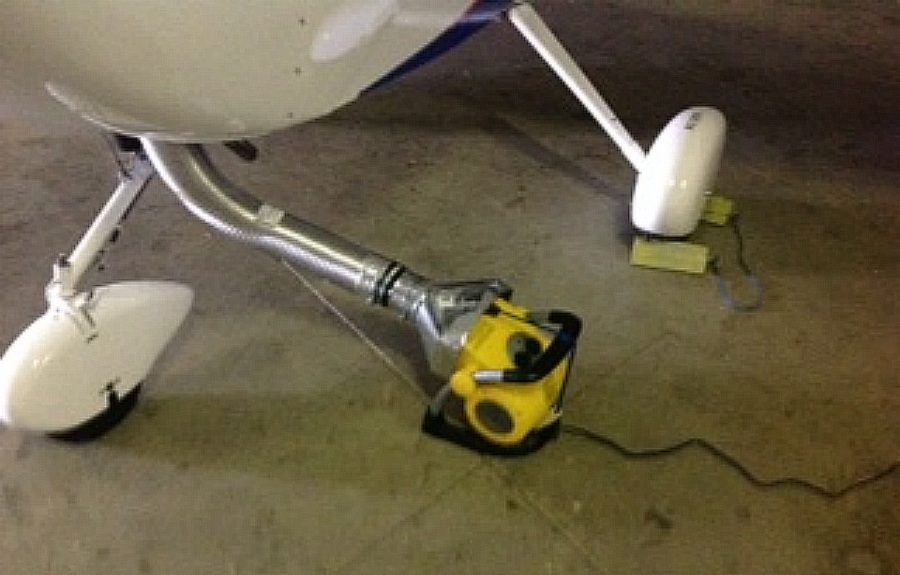
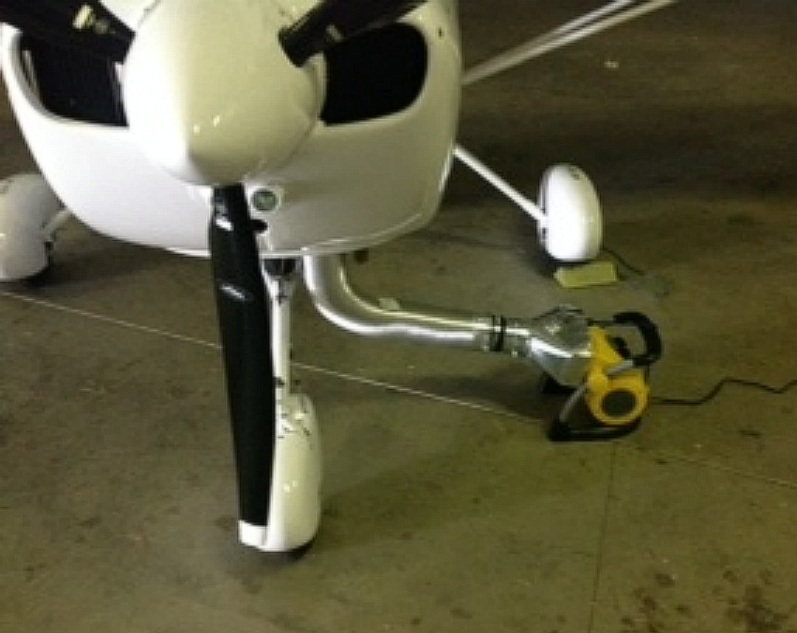
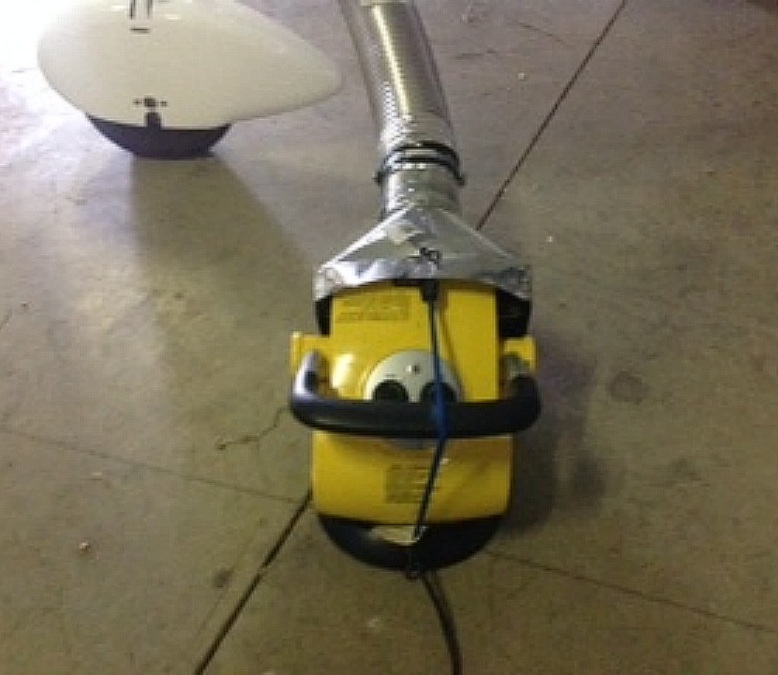
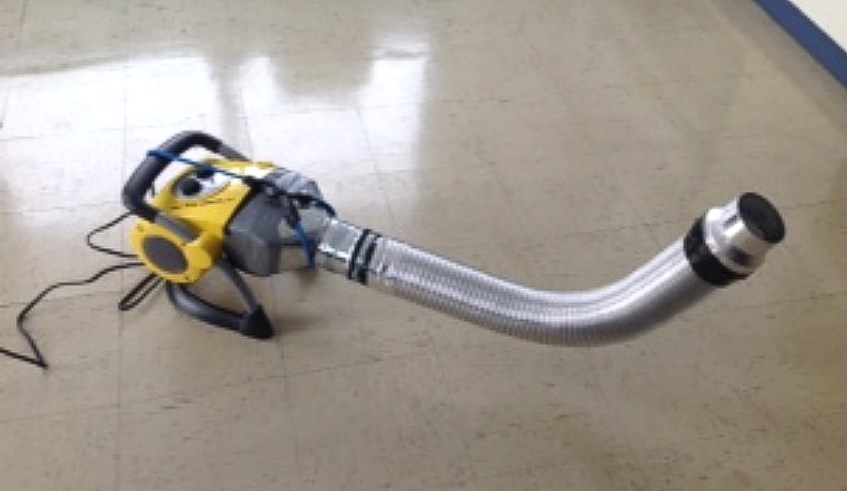
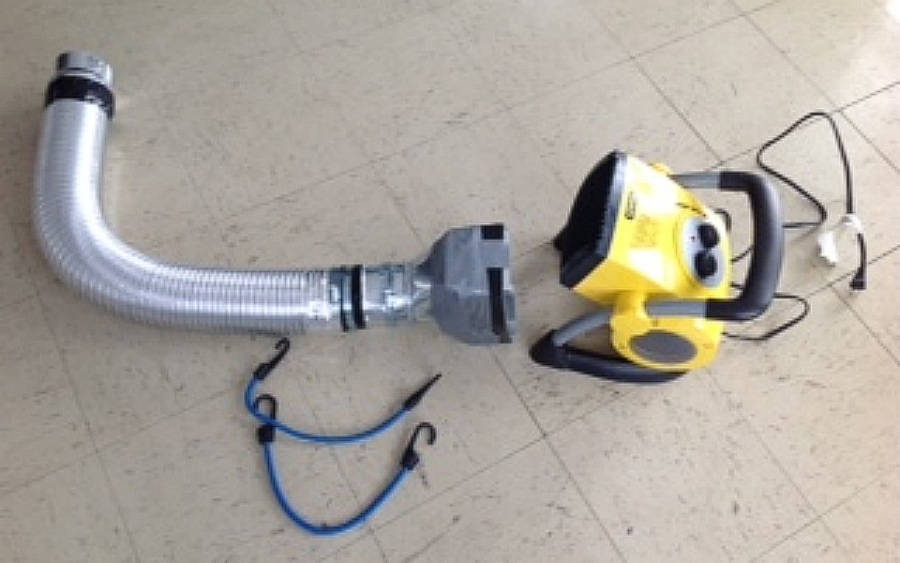
ELECTRIC ENGINE PREHEATER
This is an external engine preheater constructed by David Hoover to use
with his A240 at the GPE Flight School in Wilmington, Ohio. Dave says that the electric heater is a Stanley model 675919,
120V, 1500W, and cost $50.00. It uses a universal boot 4" x 10" x 6", cut down to fit the heater. Duct tape was used to
hold and seal the edges (but it could be sealed using pop rivets). A dryer exhaust hose is connected to the boot and two
bungee cords are used to help support the whole system on the heater. Total cost about $70. David says that he runs the
heater about 2 hours before a flight and it really works really well.
CHECKING TIRE PRESSURES and REMOVING AND REINSTALLING WHEEL PANTS
Information and photos showing how to removal and reinstall our main wheel pants is on a web page at... wheel-pants.htm
Also on this web page is a photo showing the special air nozzle we use to make putting air in the nose wheel inner tube much easier.


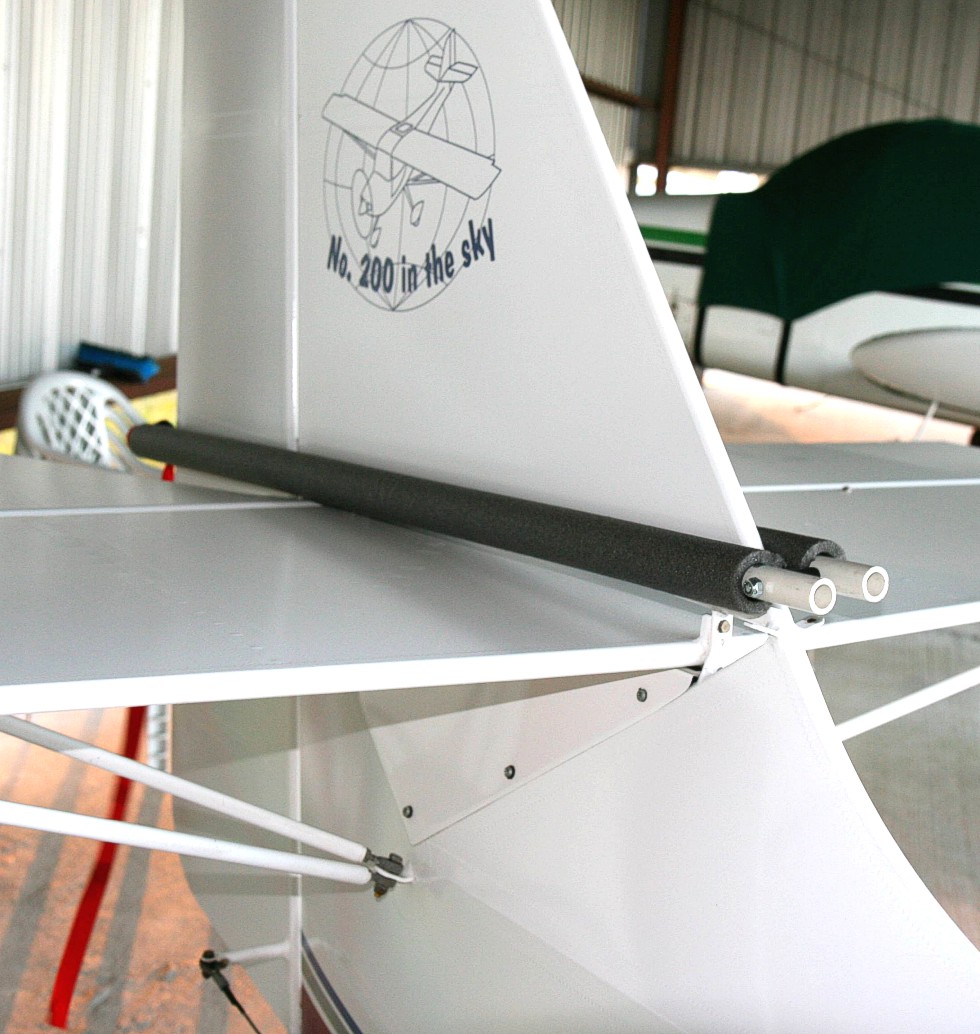
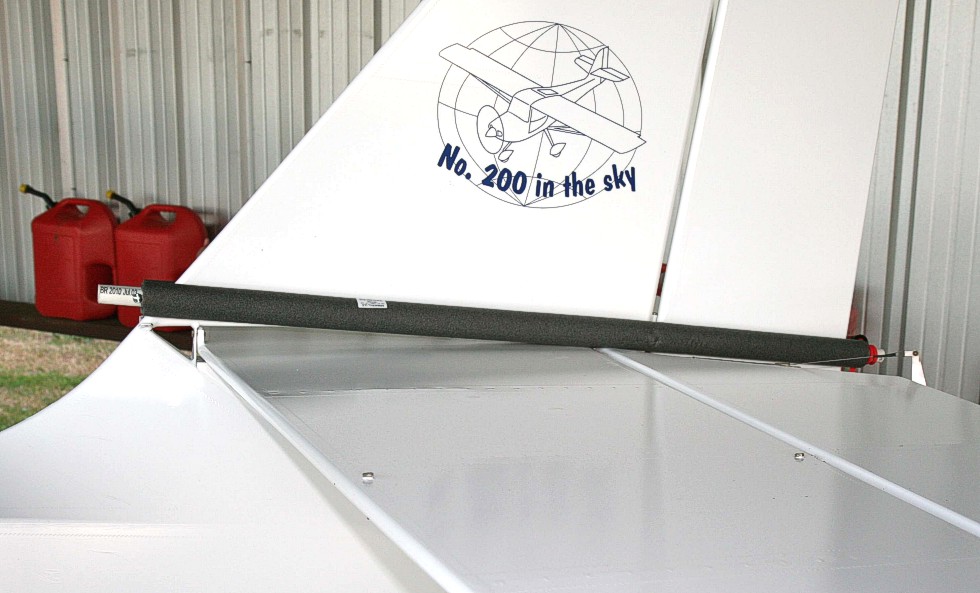
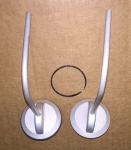
SHOULDER BELT "RETAINING STRAP"
We have been installing our "shoulder belt retaining strap" as standard in our planes since maybe 2014 or so. Without these little
adjustable strap, the shoulder belts can fall off a shoulder somewhat easily. If your older plane does not have these, we have them on hand for
$8.00/pair. These straps hold the shoulder belts comfortably together behind the pilot and passenger, as shown in the photos above.


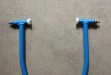

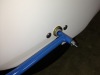

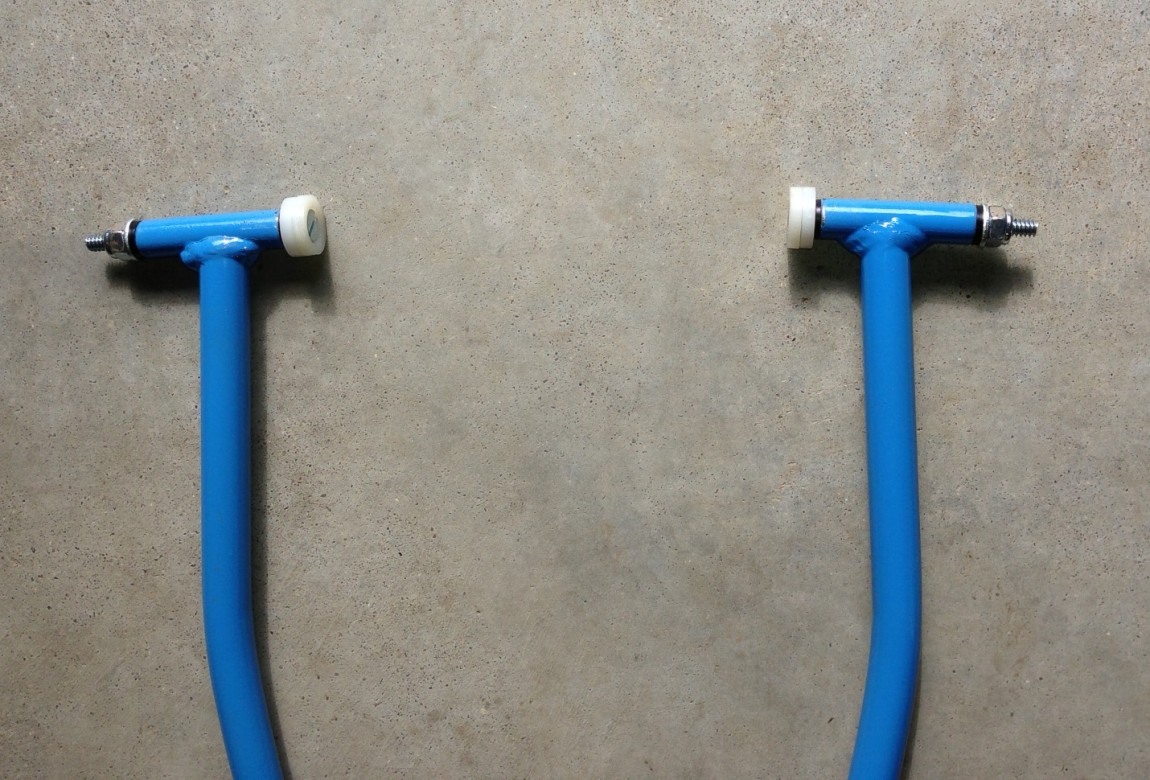
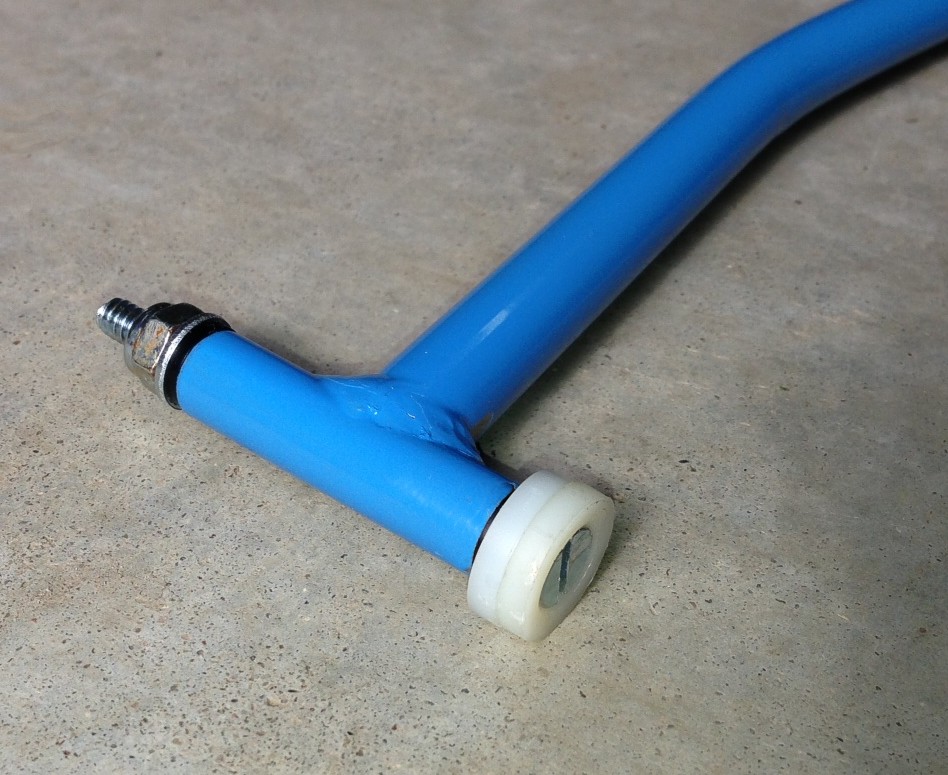
TOWBAR
Very few of our trigear owners use a towbar and it's not that hard to maneuver the plane around without it, but a towbar
might be helpful for some pilots and some situations. One of our aircraft owners reported that a towbar for a Beech aircraft works with our
(trigear) planes. This is a Beechcraft tow bar part #13-01900 from Aircraft Spruce (costs about $46.75). To use this towbar, it needs stretched
open a little further. Also, to better hold in the hollow ends of our front axle, we added some nylon spacers as can be seen in the photos above
(easy to do, and just hardware store items). To use the towbar, you sort of slide it under the wheel pant and then carefully lifting one side
and then the other up into position in the ends of the axles -- taking care to not scratch the wheel pant (though adding the nylon spacers as
shown above reduces this potential problem). This Beech towbar breaks-down into two halves and can easily be carried in our luggage compartment.

|
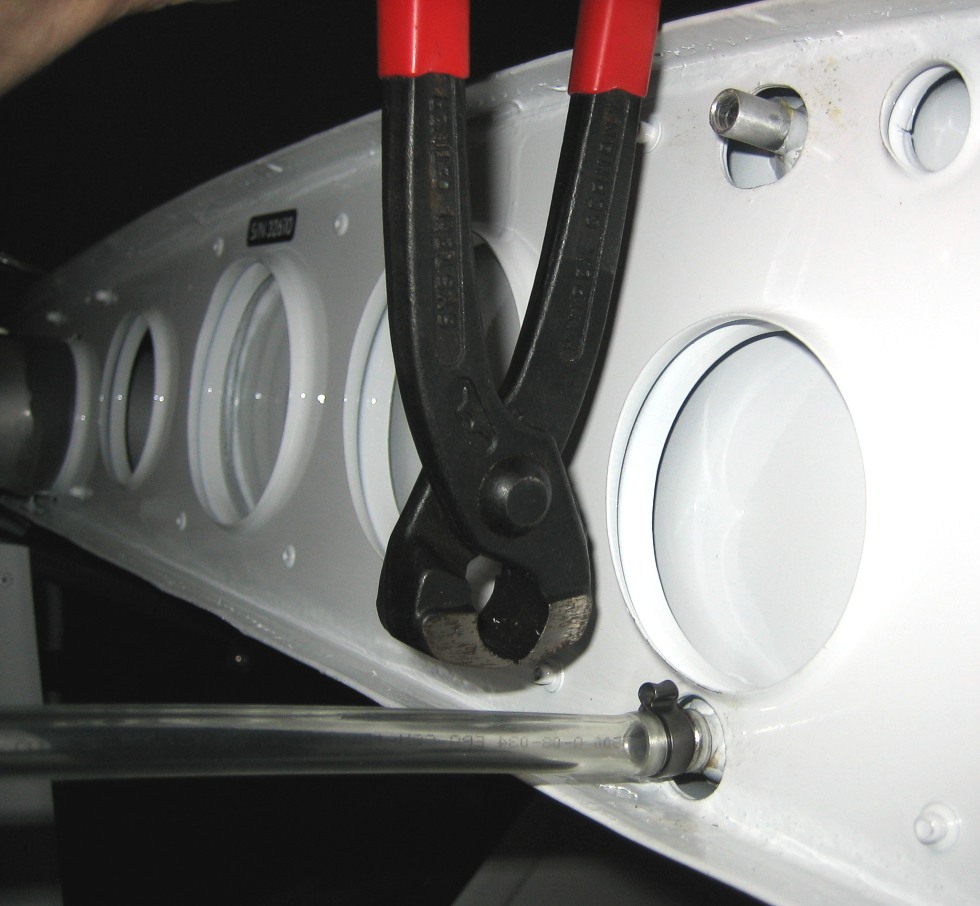
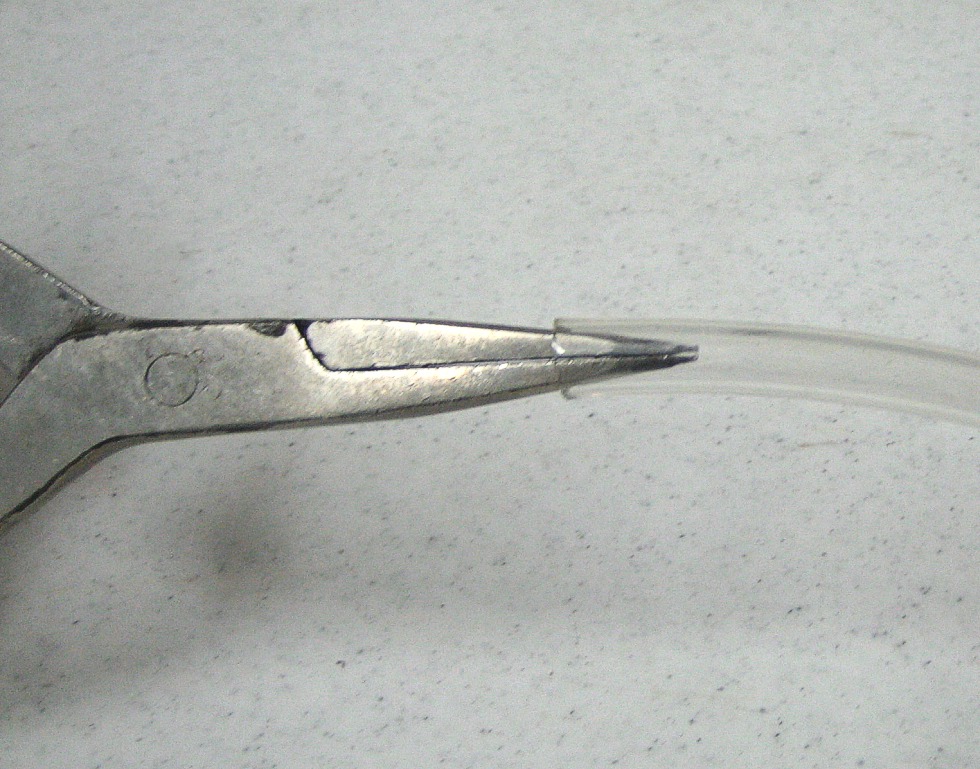
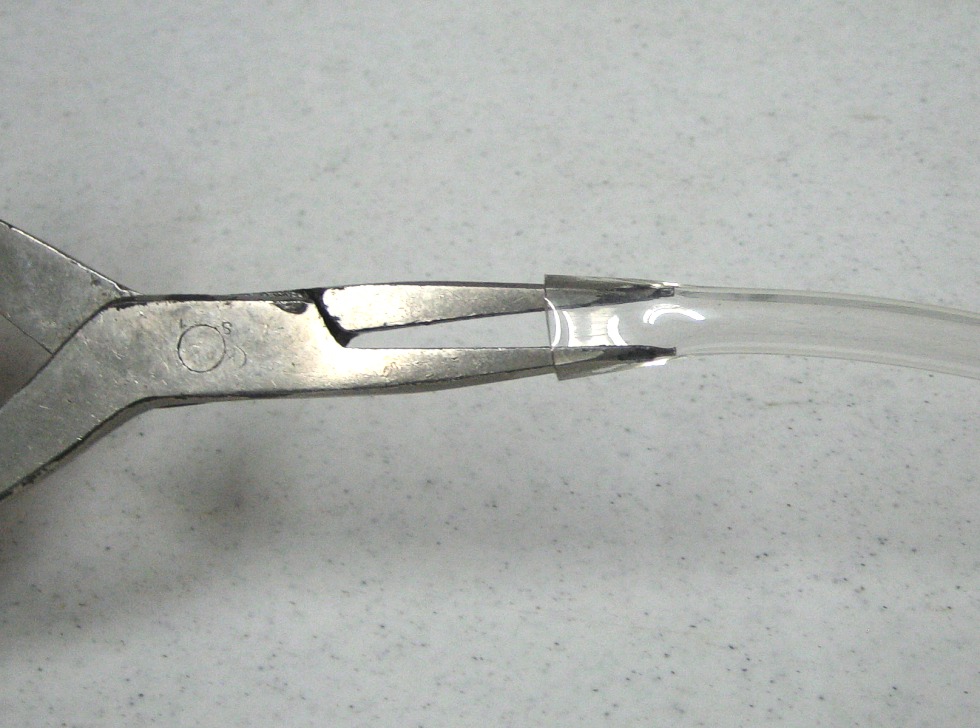
OETIKER PLIERS (for use to install or remove Oetiker clamps)
All of the Aeropro fuel and vent lines and the fuel tank sight tubes are secured in place with "Oetiker" clamps. The only Oetiker clamps we
use are the special stainless steel Oetiker clamps which have an internal ring -- so that when the Oetiker clamp "ear" is pinched, the
clamp provides very smooth and even clamping of the line or tube. The Oetiker plier easily installs/clamps the Oetiker clamps but also can
remove clamps -- by turning the pliers sideways and cutting the "ears" on the installed clamps (just cut one side of the ears at a time to
make it easier -- the stainless steel is very tough).
|
If any of our aircraft owners have questions or suggestions, please contact us!
|
for more information, please contact . . .
|
|
|

|
|
Aerotrek® Aircraft, Inc.
Bloomfield, Indiana
phone: 812-384-4972
email: aerotrek.aero@gmail.com
additional sales/service centers:
California sales center: San Francisco, CA
Texas service center: Denton, Texas
Alaska sales center: Palmer, Alaska
|
|